Click on any image for a slideshow!

Mosquito Society Report for the 4th Quarter of 2016
Here is all the news that is fit to print on what we accomplished in the last three months of 2016. Enjoy!
Volunteer Hours
Board members of the Mosquito Society worked a total of 165 hours during the fourth quarter of 2016 on all duties required to run the organization.
Additionally, members of the society worked 1867.5 hours on the Mosquito and 32 hours on the Hurricane over the same period on 30 separate dates in Calgary and in Nanton.
Note that the volunteer hours on the Mosquito are again at a new record high, as we continue to attract more volunteers with several Saturdays in this quarter seeing more than twenty people coming down to Nanton. Total volunteer hours for this quarter are 2064.5.
Total volunteer hours for the year are 800.5 for admin work, 695.75 on the Hurricane and 5936.25 on the Mosquito for a total of 7432.5 for 2016. This compares with 6314.5 for 2015 and 4616.5 for 2014.
Hurricane
Historic Aviation Services' focus for the fourth quarter of the year has continued on the sheet metal areas of the forward fuselage and on the woodwork from the cockpit back to the tail. Additionally they were able to mount the engine into the airframe and begin to install the coolant and hydraulic plumbing lines, making significant progress in this quarter.
CMS board members Jack and Andy were in Nanton on December 9th to assist two staff from Historic Aviation Services in locating Hurricane parts that both we and they continue to identify as being mixed in with our Mosquito parts. This meant hauling crates from the storage trailer on the north end of town to the Bomber Command Museum in -25C weather. As personnel from both organizations get more and more familiar with the details of our projects, we are able to identify unlabelled parts as belonging to each aircraft. This trip produced some significant results.
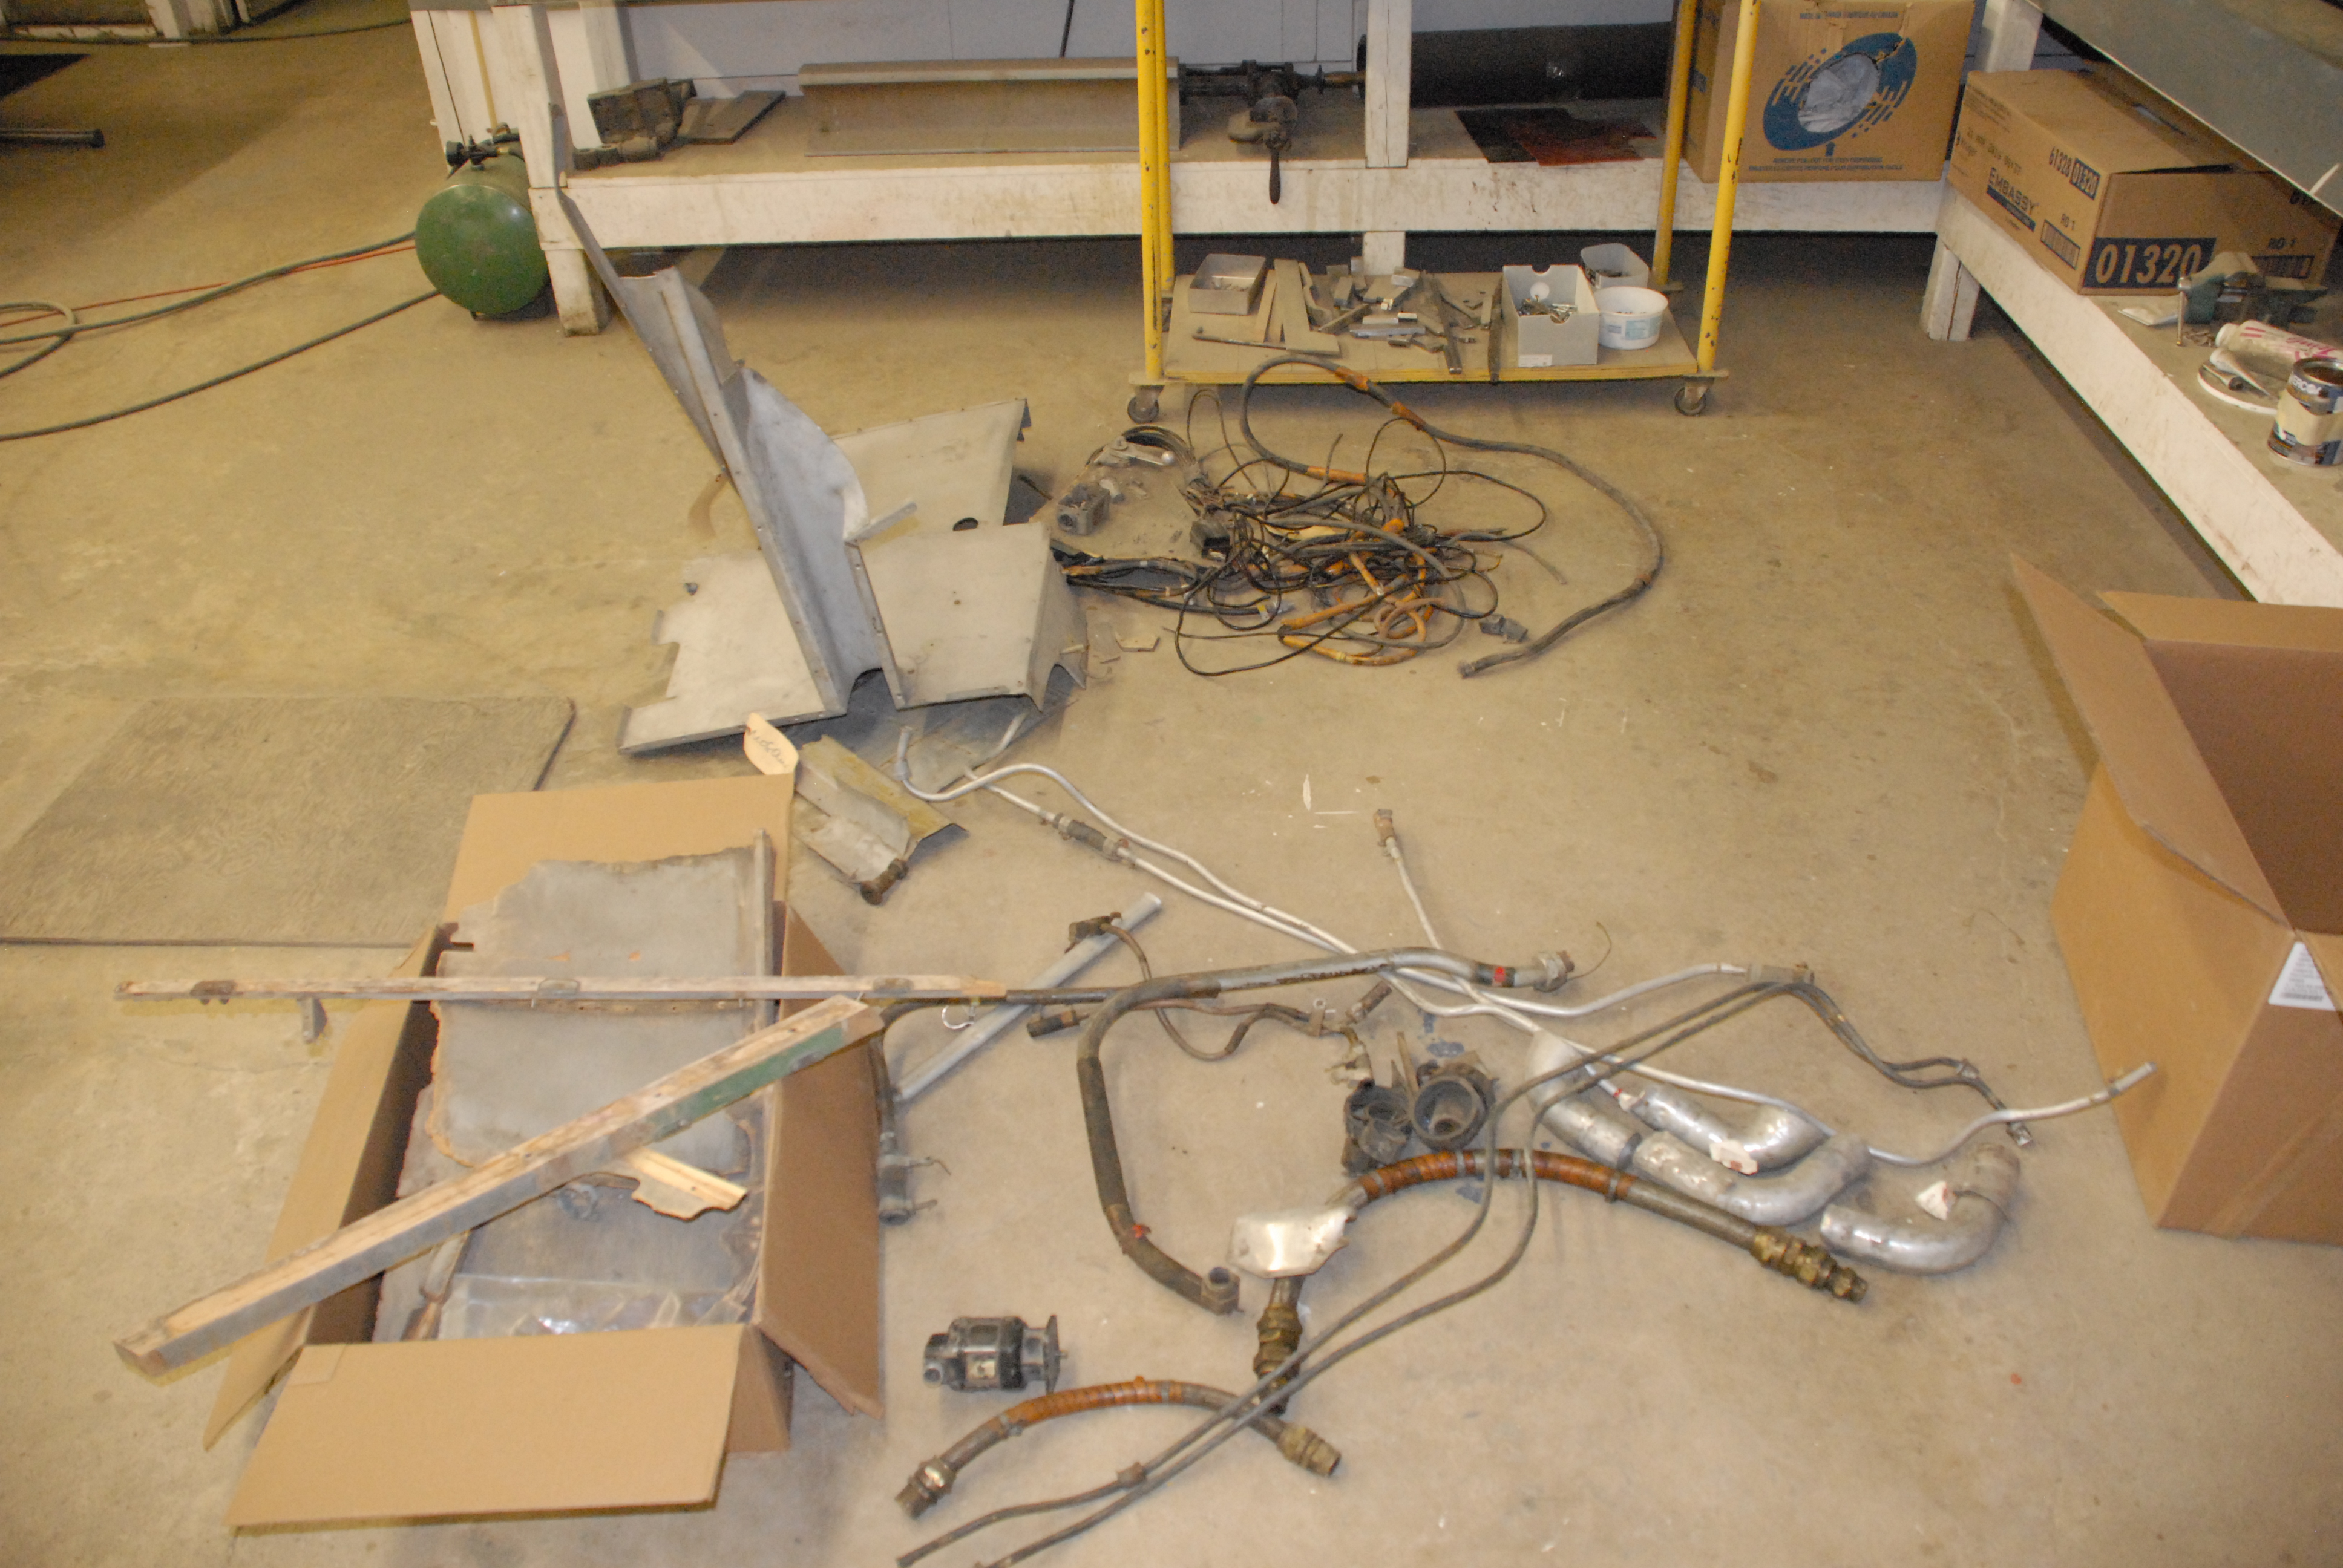
Some of the Hurricane "treasures" located by CMS and HASI personnel on the December 9th trip to Nanton. It included center section panels, woodwork, coolant pipes and cockpit equipment.
On the following Friday, December 16th, we travelled to Wetaskiwin to conduct our quarterly inspection of the project.
Airframe: Historic Aviation Services
Fuselage
- Fabricated port and starboard lower longeron keel stringers and install same in place on lower fuselage.
- Using intermediate belly panel received from England as reference - fabricate missing complete forward belly panel from scratch. Recover with Poly-Fiber fabric using the STITS process up to silver.
- Strip fabric from intermediate belly panel (England) clean, repair as required and recover with Poly Fiber fabric using STITS process up to silver.
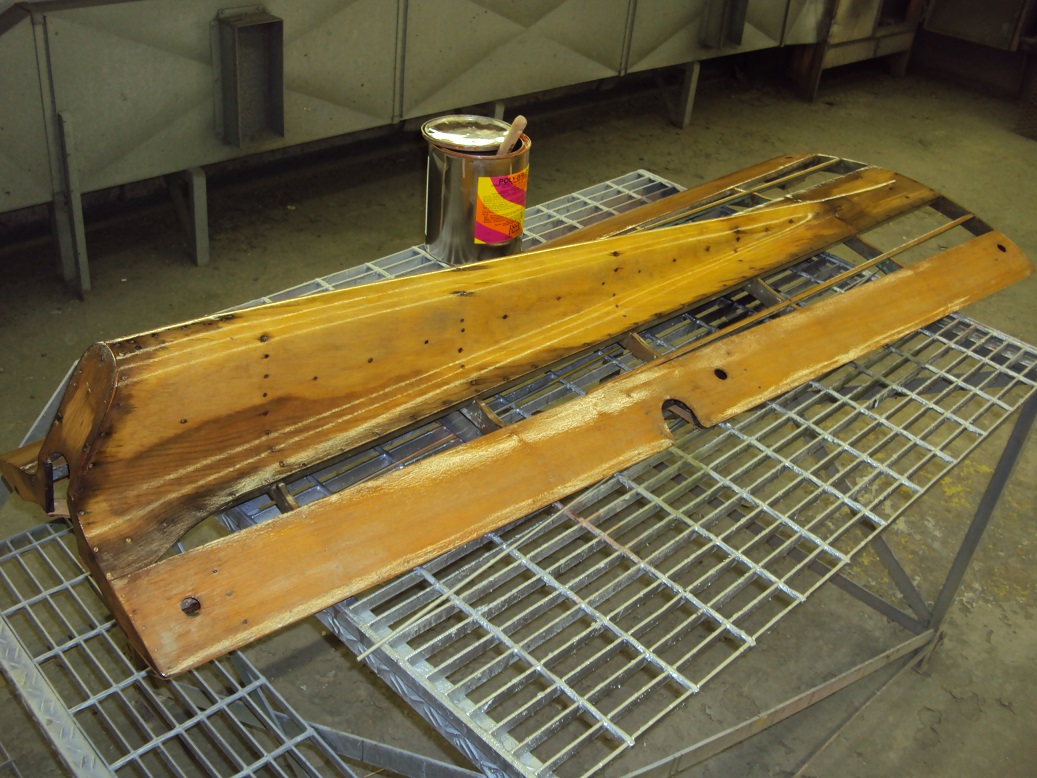
This is the lower, rear fuselage belly panel acquired from a vendor in England. Here it is being stripped and recovered before installation.
- Fabricate port aft trailing edge central section closure panel (missing) using starboard panel as mirror image. Repair starboard panel as required. Primed and painted inside of both panels with silver butyrate.
- Fabricate, prime, paint with silver butyrate and install attach angles and braces for port and starboard panels (as above). Install port and starboard aft trailing edge centre section closure panels in place.
- Cover aft radiator belly panel with plywood skin and recover entire panel with Poly Fiber fabric using STITS process up to silver.
- Fabricate attach brackets for aft radiator belly panel (missing) and install on lower fuselage.
- Temporarily install aft radiator belly panel, forward and intermediate belly panels and finish fit to lower fuselage.
(All woodwork described above given two coats of "Poly Fiber" epoxy varnish, and sprayed with two coats of silver butyrate as required during build up process).
Engine and Firewall Forward
- Clean, and repair engine mounting hardware.
- Make up new port and starboard camshaft cover gaskets, install same on engine.
- Disassemble and troubleshoot seized engine super-charger and carburetor controls.
- Clean, repair as required and reassemble engine control differential and spider gear bell crank assembly and reinstall on engine.
- Prepare engine for installation in airframe.

A big moment in any restoration project: Rejoining the engine to the airframe. Probably the first time they have been together since 1963.
- Begin fabrication of firewall coolant header tank brackets (originals missing).
- Installed engine in aircraft and secured same in motor mounts. Torque and lock motor mount bolts.
- Finish fabrication and install firewall coolant header tank brackets.
- Clean, repair, test, prime, paint coolant header tank. Install same on firewall.
- Install carburetor air intake scoop.
- Sort, clean, prime and paint glycol coolant tubes. Install same in fuselage. Coolant system now complete other than two missing sections between engine water pump and front spar. System installed with deteriorated, original "Avimo" rubber couplings.
- These are to be replaced when new, fresh examples are available.
- Clean, prime, paint and install fuselage fuel tank armor plate in top cowl forward bulkhead.
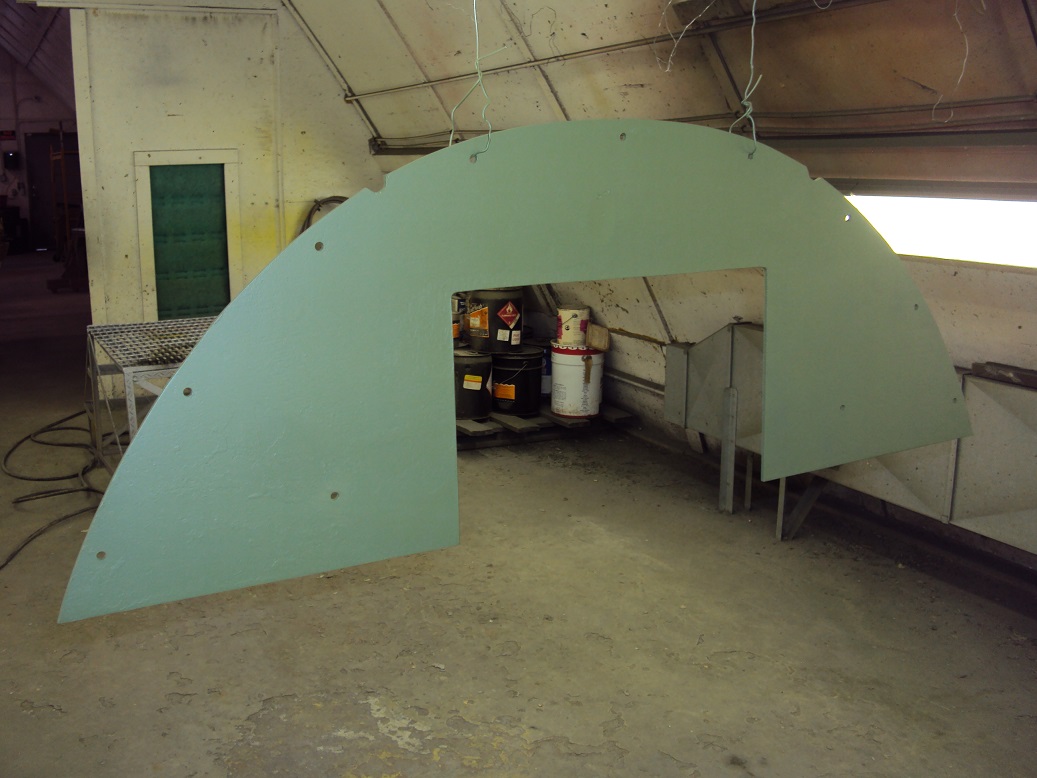
The fuselage fuel tank armour plate as described above.
- Sort, clean and repair engine oil system lines, filters, valves, junction blocks, unions etc., as required.
- Begin trial installation of engine oil system components in fuselage and centre section.
- Finish and final fit metal center section belly panels aft of rad.
- Sort, clean and repair aircraft fuel system lines, filters, valves, junction blocks, unions etc., as required.
- Begin trial installation of aircraft fuel system components in fuselage and center section.
- Repaired, primed and painted starboard gear wall panel (forward of fuel cell) and trial fit same to center section.
- Clean, repair, test, prime and paint coolant thermostat. Install same in fuselage, connect to glycol coolant tubes.
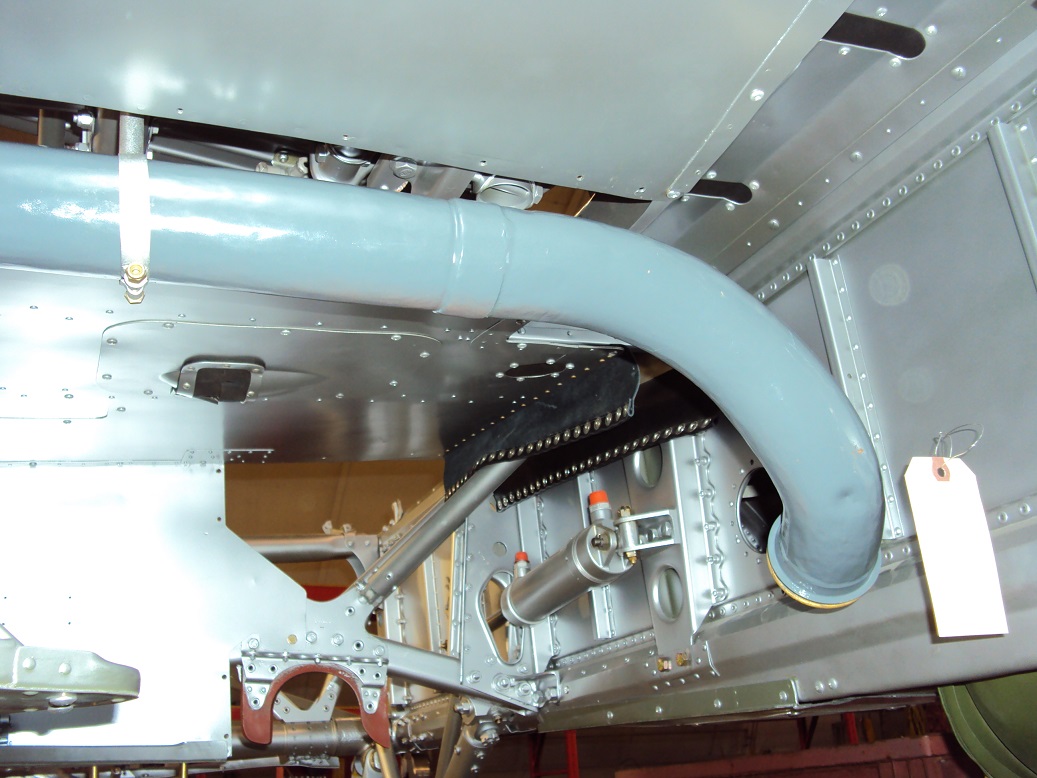
Engine coolant pipe transitioning through the wheel well on its way to the radiator. Although this is all copper tubing, Canadian Car and Foundry chose to paint it all grey.
- Sort, clean and repair secondary hydraulic and hydraulic relief system lines, filters, valves etc. as required.
- Cleaned, repaired and installed engine crankcase ventilation and oil separator system.
- Began sorting, cleaning and repair of pneumatic system components.
Mosquito: Jack McWilliam
Starting from the nose of the aircraft and working aft with the progress on the fuselage: The ring supporting the nose blister had a large amount of distortion and delamination on the right side from roughly the 7 o'clock to 11 o'clock position. The old glue was removed by picking out the old material with dental equipment. The gaps and depths are large enough that the gluing is being done in stages, with filler being added to eliminate sagging. The first layer is complete. The bottom bulkhead of the ring was badly chewed up so a new piece was constructed and fitted to the ring.
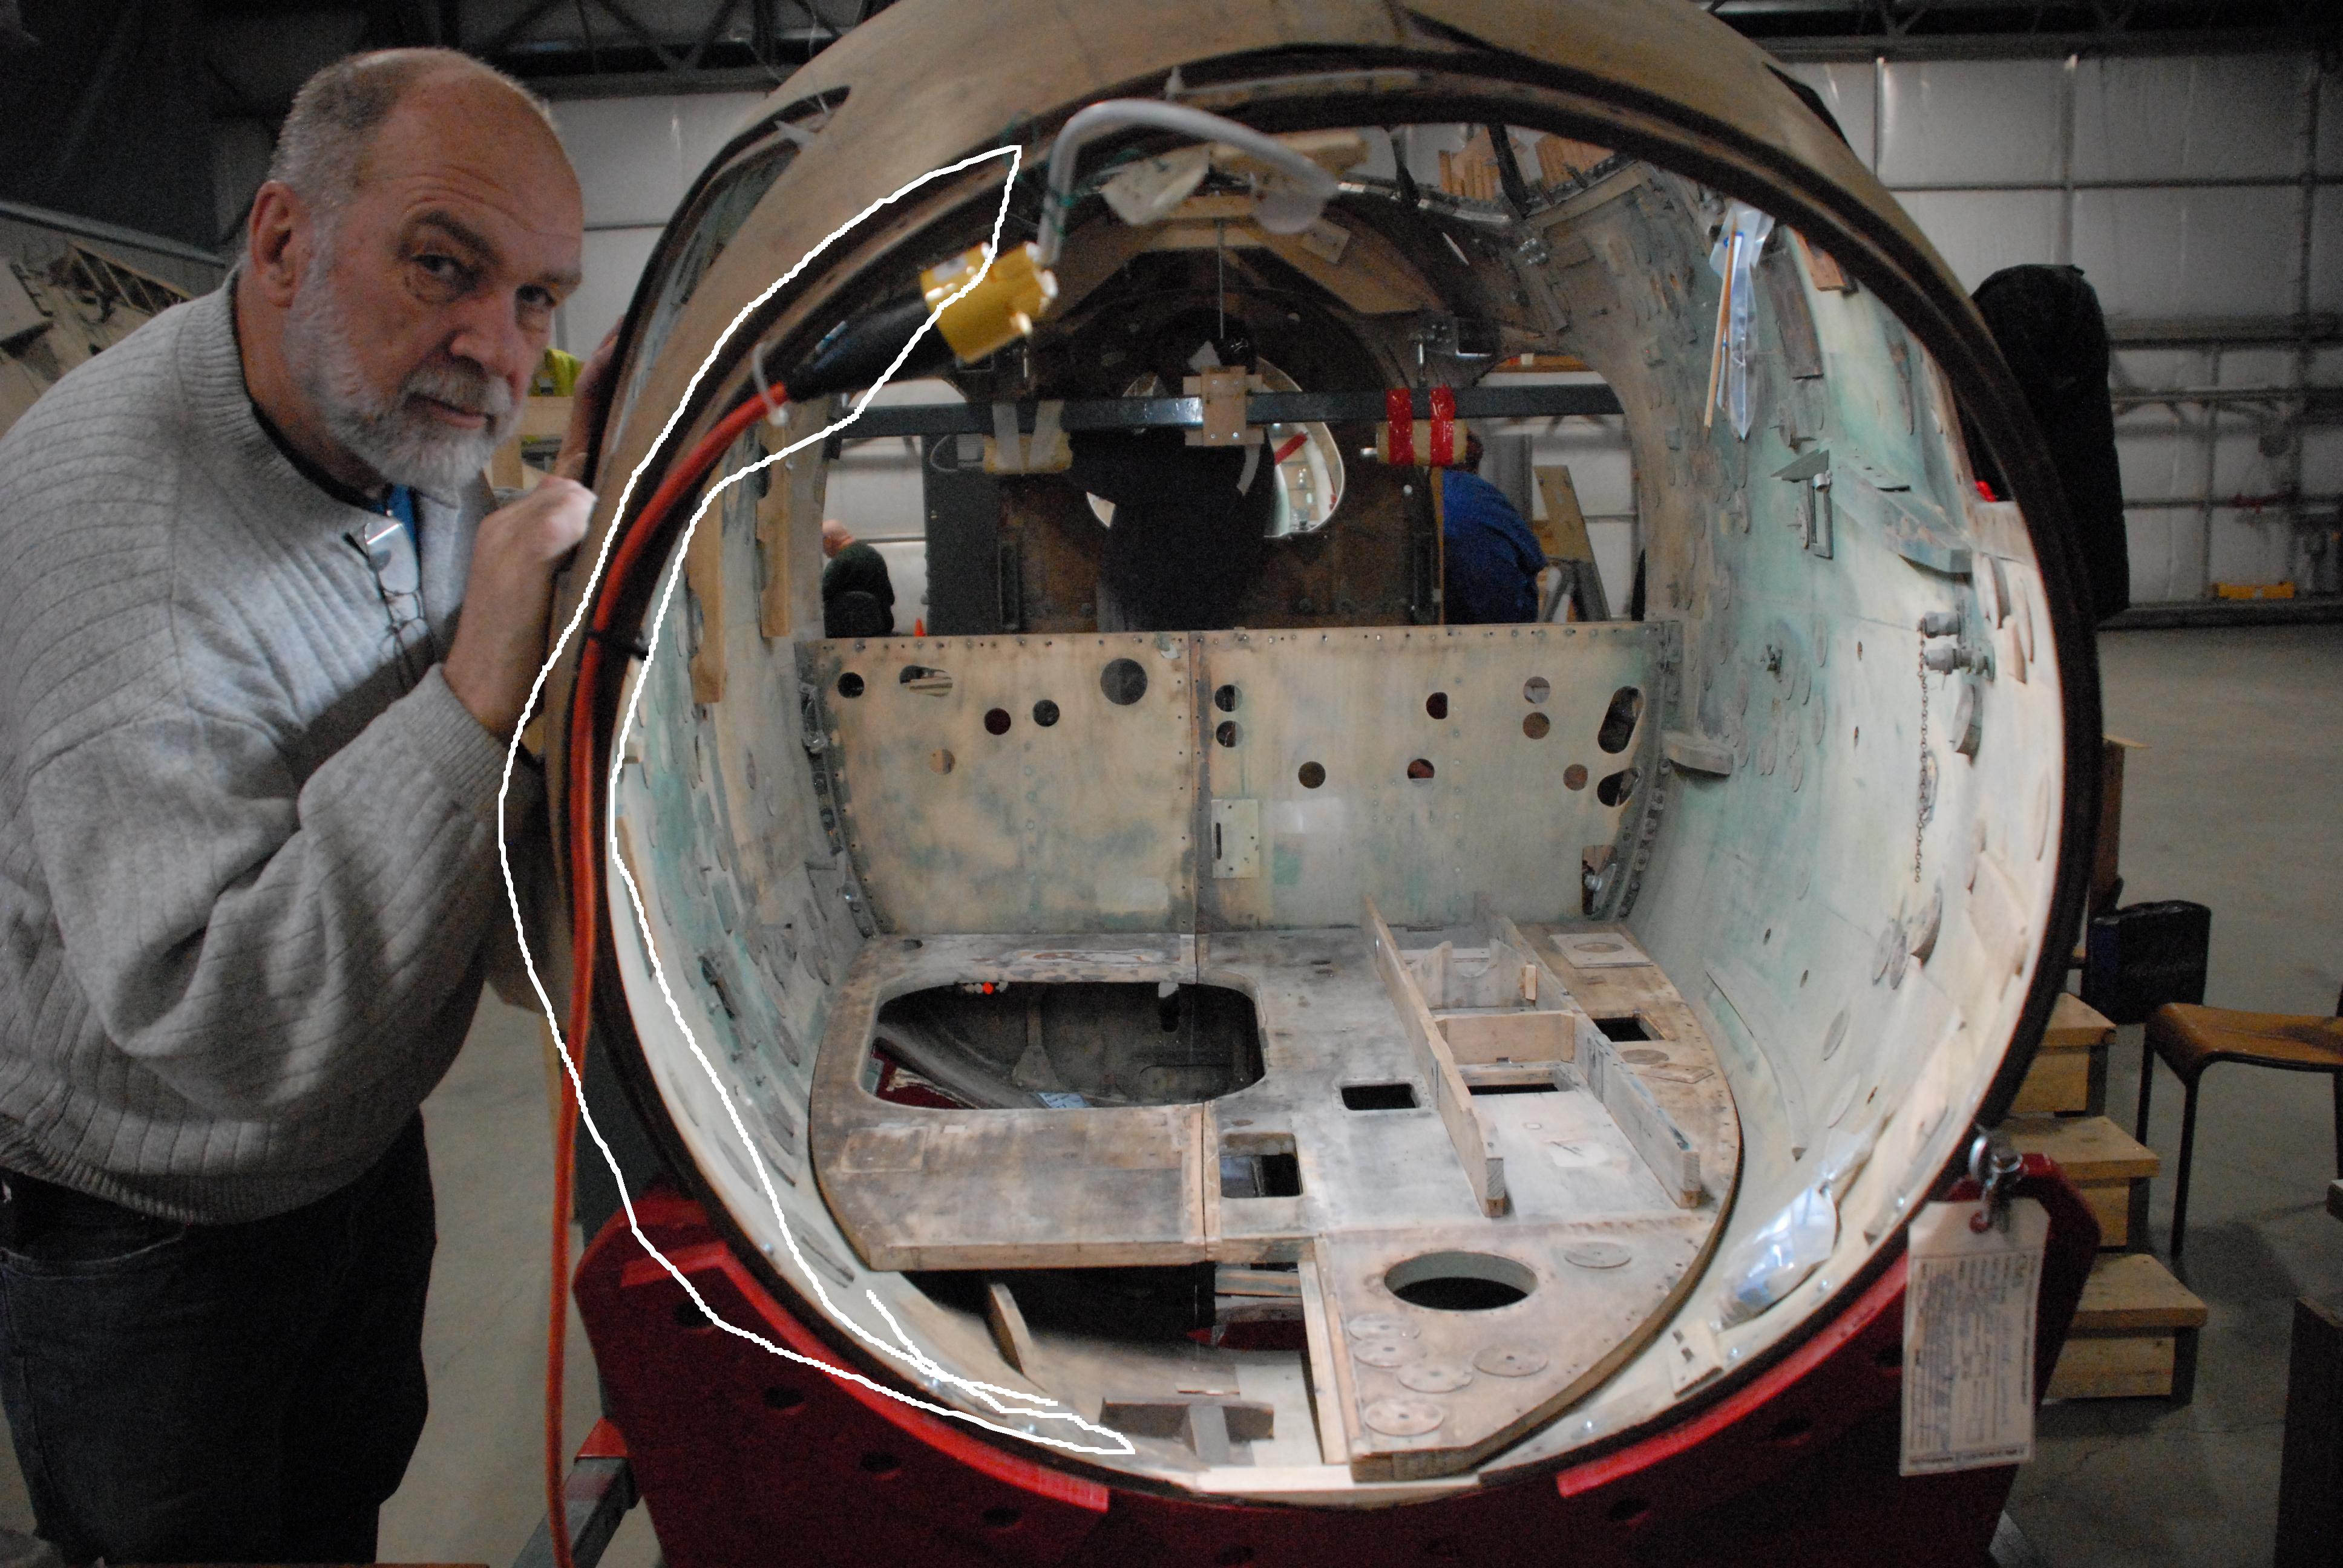
Outlined in white is the area described above, showing significant signs of delamination which was cleaned with dental picks and the re-glued in stages.
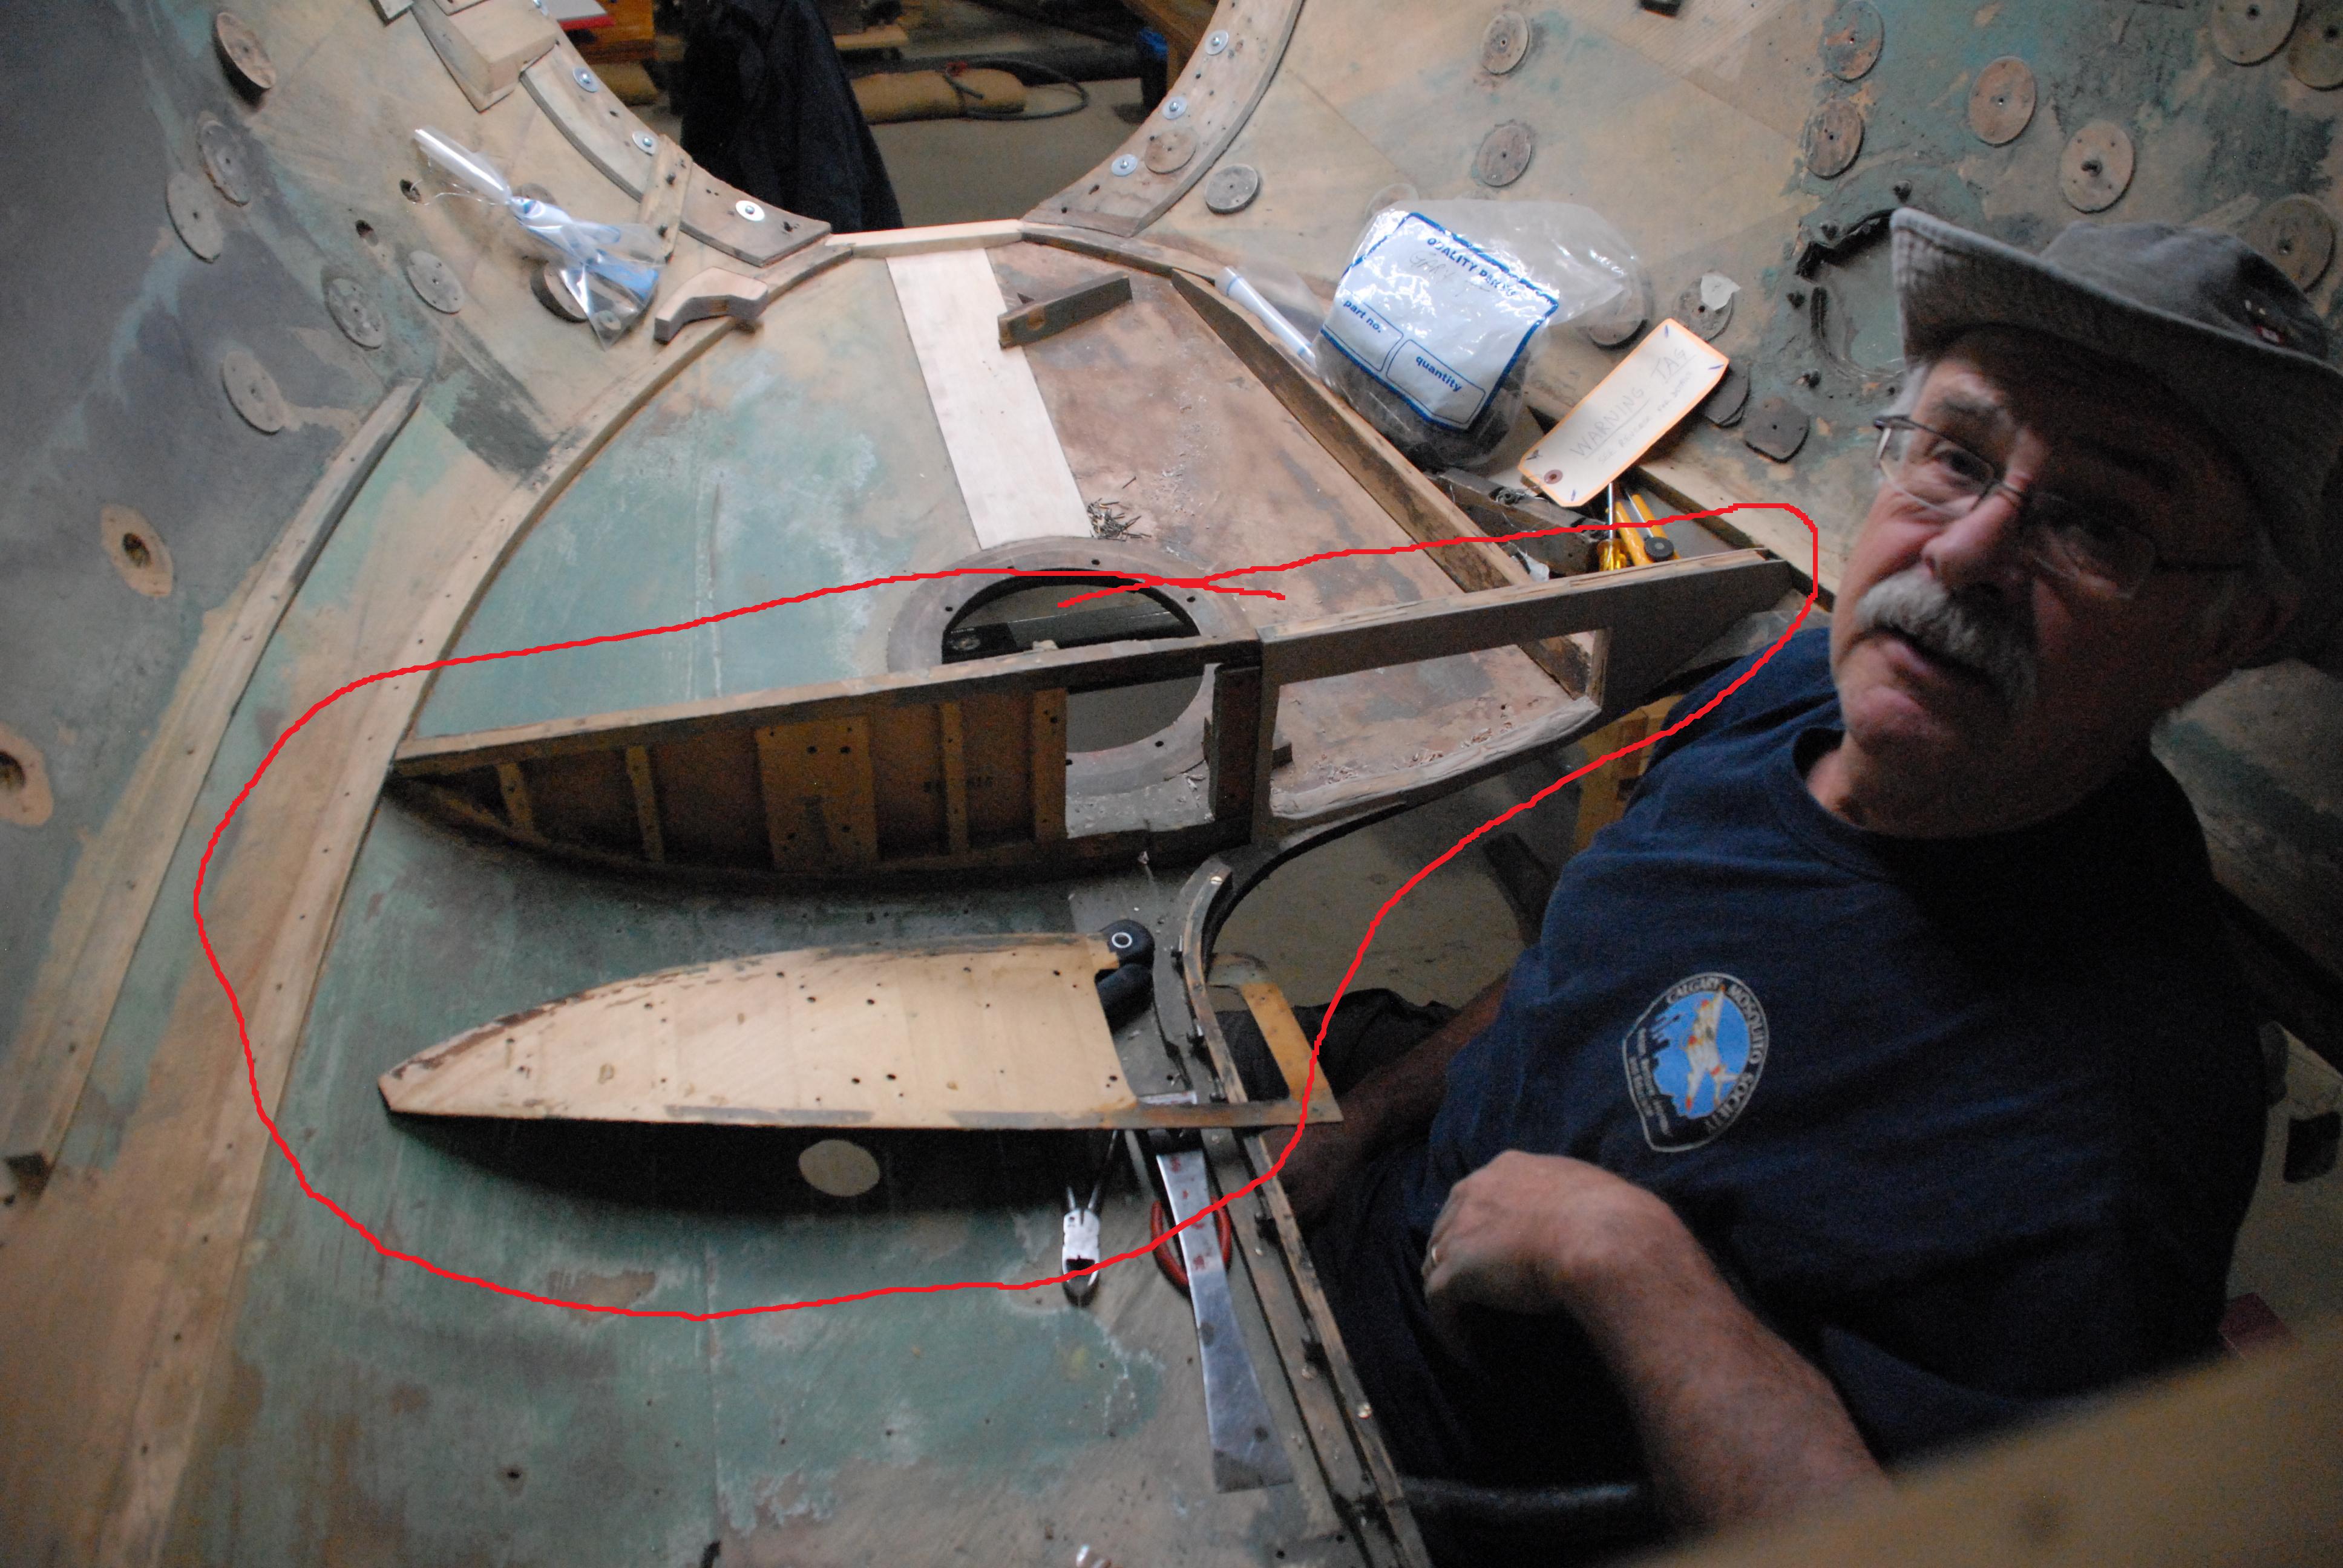
The center line split was removed; new parts were made and installed. This eliminated an antenna hole that was badly damaged as well as allowing us to re-bond the center line forward of the door area. The original glue joint had crystallized and dental picks were used again to clear the joint.

Circled in red are the newly installed centerline pieces. This is at the forward most, lower joint of the fuselage, just under the cockpit floor. These few lines describe what is likely +15 hours of work.
We continue to go over the inside of the fuselage inch by inch starting at the area below the floor boards. Depending on the type of damage, delamination, holes, gouges or just plain rot will dictate the repair method. A variety of methods from pressing glue into the joint or applying .025 inch veneer patches to the top layer of plywood appear to do the trick. Dick has been working with rare earth magnets, which work very well to hold smaller pieces in place as the glue dries.
The bonding of the internal skin to the balsa core is an issue, as large areas are delaminated. We will switch from T88 to less viscous epoxies to re-bond certain areas of the skin. Both a general epoxy and cold cure will be injected under the plywood depending on the individual requirements. Tech support at System Three, the makers of T88 epoxy, have suggested we also add some silica to the general epoxy while injecting it as fill. There is a higher clamping pressure required for the cold cure so we will make telescoping supports to push out on the skins. A large number of the injection points will be areas were the ferrules containing the anchor nuts are missing or require re-gluing.
The bulkhead under the floor on the right side with the crew ladder access door has been replaced. The original plywood was broken in multiple pieces, but the rib was intact. You will recall the rib had worn grooves from the crew ladder being installed. The new plywood was bonded to the rib, sanded to match the wear marks of the rib. We are very happy with Gary's installation as we can still see the exact path of the ladder each time it was slid into place.
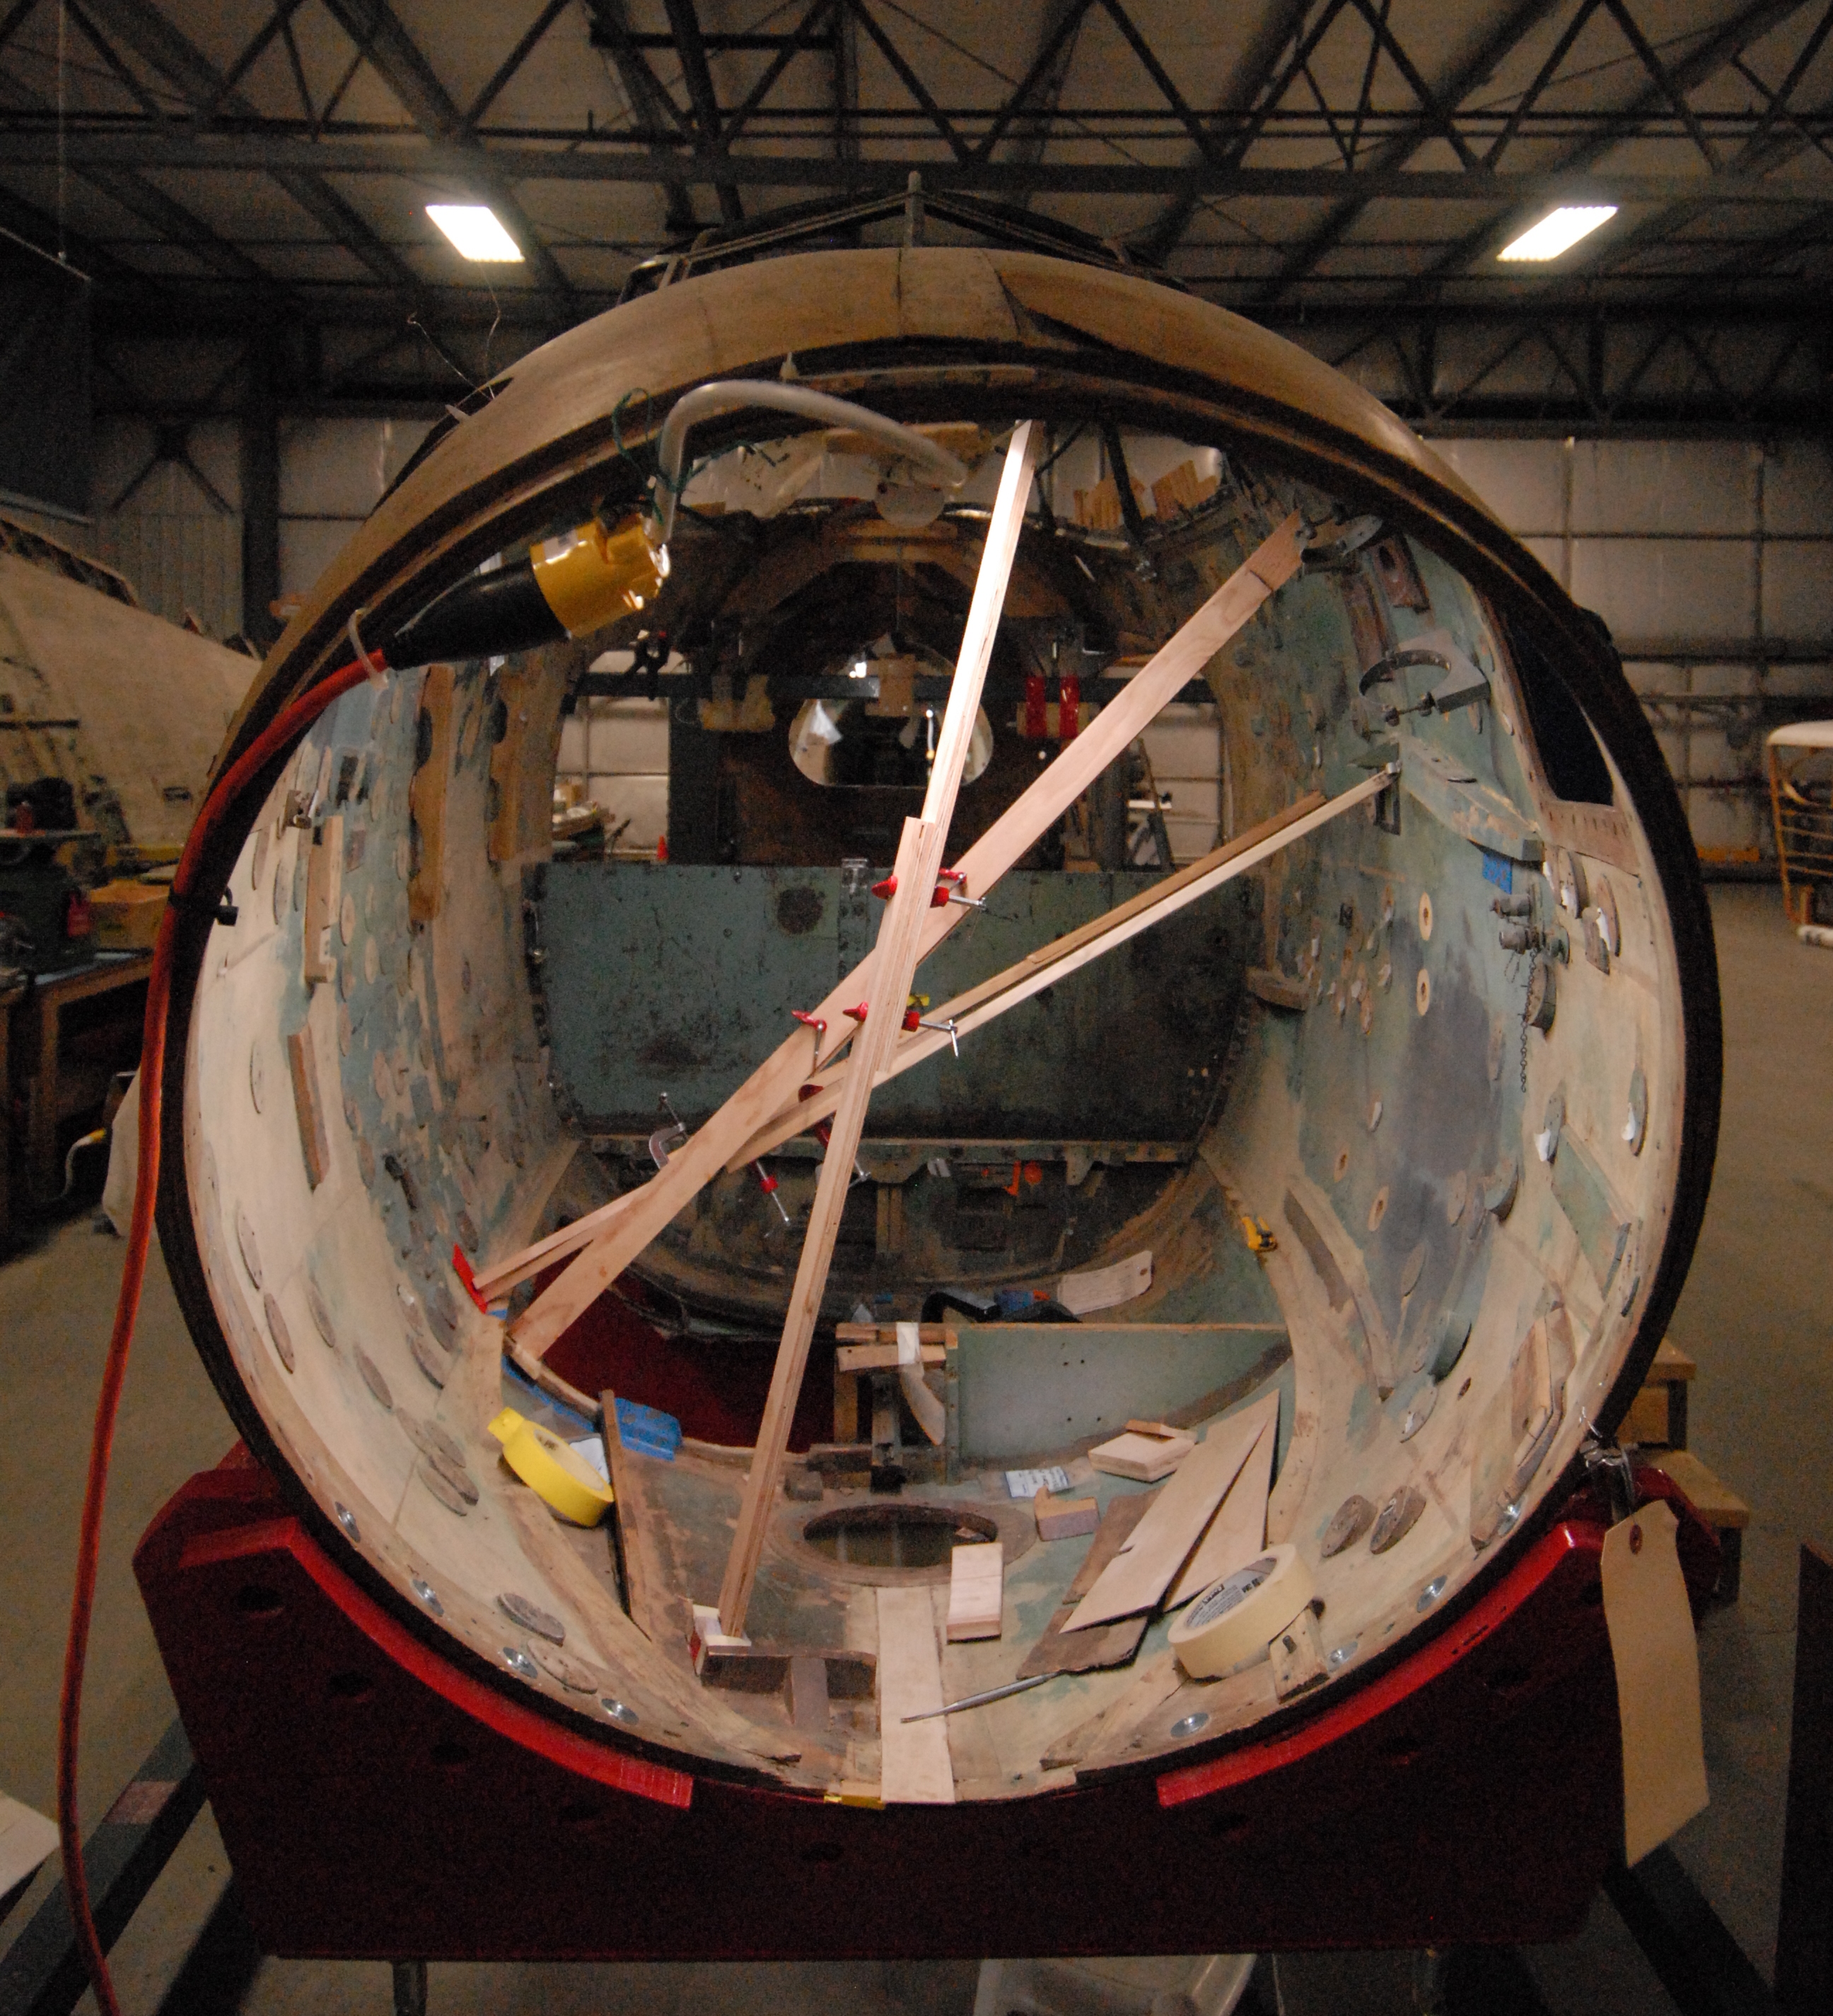
Seen here are the temporary telescoping supports used to hold newly reinstalled wood pieces inside the nose and cockpit area as the glue dries and cures.
Gary T. working on the bulkhead just forward of the crew access port. The right side was replaced with all new material while the left side is repaired with new ribs and original ply. The hole on the right side of the bulkhead is where the ladder is stored and shows years of wear on its lower edge.
The left side was exactly the opposite, as the plywood survived but the rib was falling apart. A new rib has been fitted but will be installed after more cleaning is completed in the area of the crew door sill. Components of the crew door sill have been removed for repair; the sill itself is still firmly attached at the center line. Delamination on 50 per cent of the outboard section of the sill requires us to gently lift it to remove all the years of debris and crystallized glue.
The cockpit floor repairs are complete and Andy has reassembled the primary structure with the floor boards now ready for paint. Paint matches are done and the first gallon of interior paint is ready to be applied. We will run some tests on the paint to check how it covers on both the new wood and the old. It is a self-priming paint but we have yet to discover how many coats will be needed.
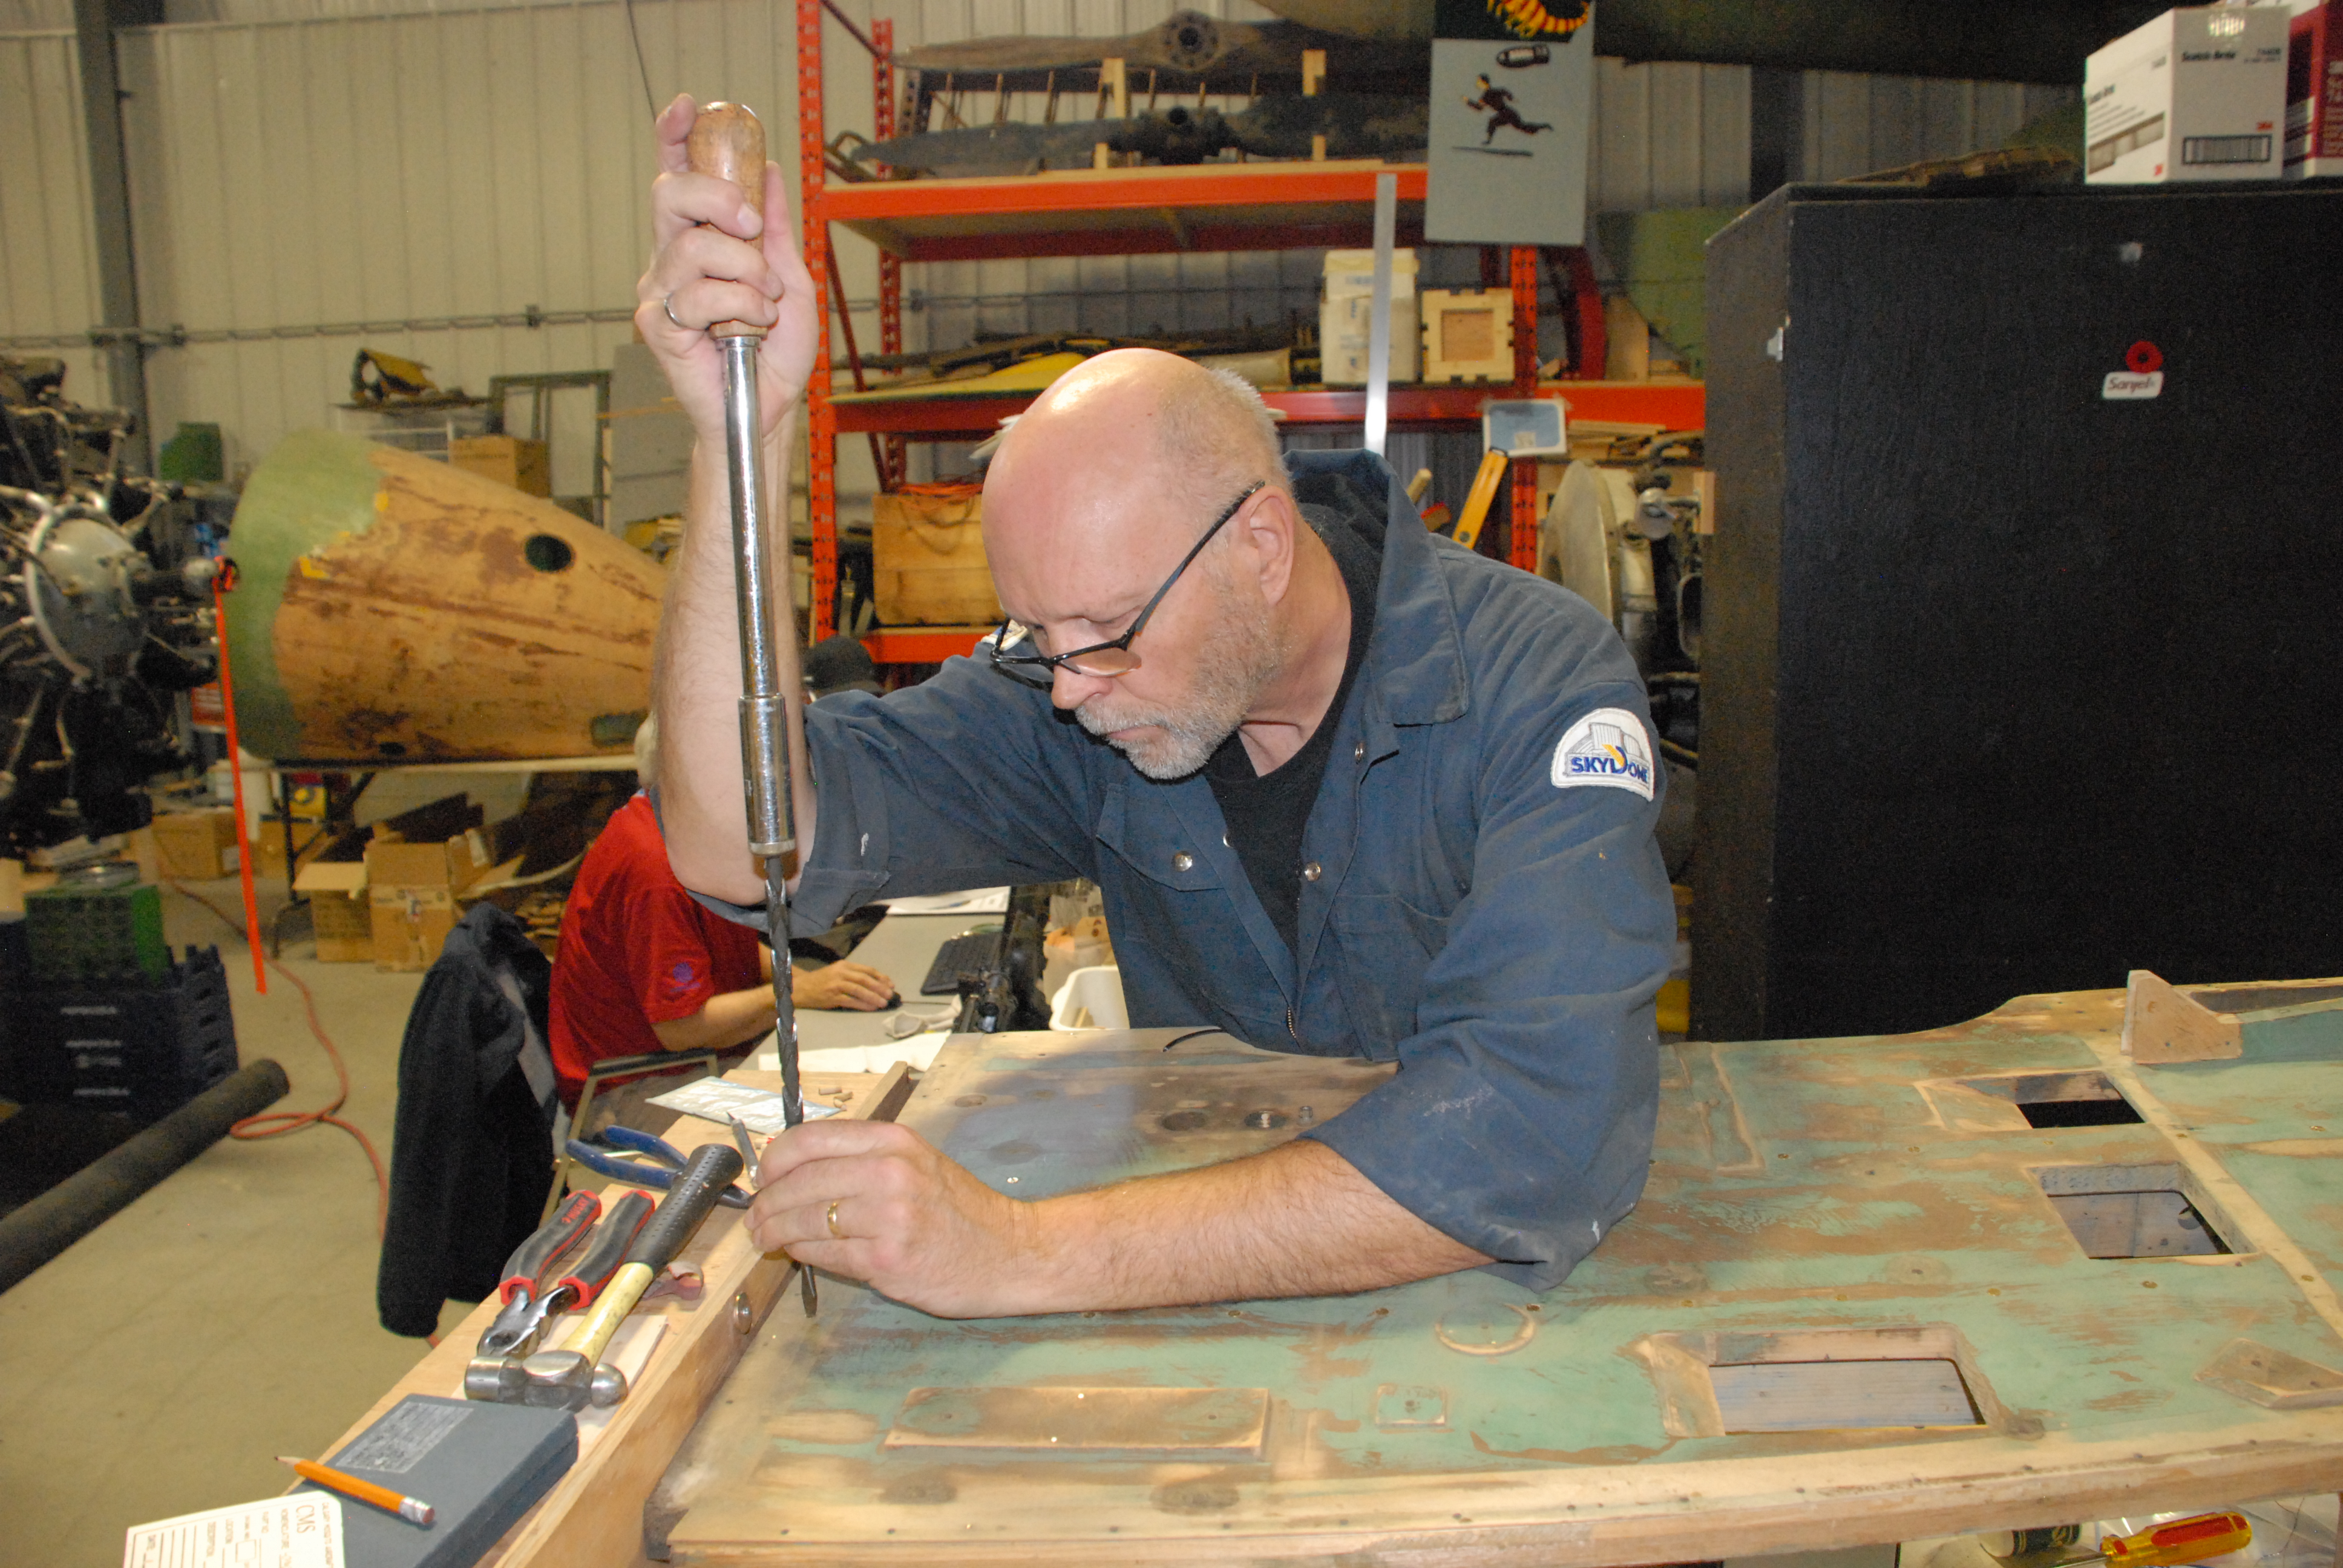
Andy W's most recent project has been the restoration of the cockpit floor which was removed from the fuselage last July. Here Andy uses a Yankee screwdriver to reinstall some hardware on the underside of the floor. Though often discouraged today, the Yankee was a favourite tool of de Havilland workers to secure the thousands of brass screws.
Various metal parts for the floor board are now being painted so they can be re assembled on the floor. The armour plates are ready for paint and will be installed as soon as possible to reinforce bulkhead two as it is rather flimsy without them.
Some of the plumbing from beneath the floor is being cleaned internally and inspected for damage. The lines will be pressure tested as well, given that their location under the floor means that once installed they are all but inaccessible.
Moving aft of the cockpit, the internal structure is basically cleaned out and inspection of the structure is continuing. Large brass screws which hold the main wing attach
Ken P. and David D. work to remove the armour plating from the front side of bulkhead 2. It has since been stripped and repainted and is ready for reinstallation. The Mosquito crew sat on top of this bulkhead and the armour plating protected their legs from enemy fire from behind them.
points together are being worked on, with some of the screw, having the heads missing, backed out or broken off. Once this area has been satisfactorily inspected and repaired, new skins will be installed on the outside.
Repairs on the left side of the fuselage around the two windows are now complete. A slightly different approach was used on the skin around the windows. Instead of removing the skin and splicing in new skin, a new sheet of plywood was bonded to the inside of the old skin. This worked faster than splicing but wasn't without its problems. The massive number of staple holes throughout the inside made the old skin look somewhat like an art display. After removing the new glue excreting through all the holes it has left us with a large number of indentations from the old staples that now need filling.
The de-ice tank has been repaired by a local machine shop that took it as a challenge. Trillion Industries welded the corrosion holes then pressurized the tank with water, doing a very nice job of cleaning up the bent filler neck. The tank was then strapped to a vibrating tumbler and filled with corn to clean the inside of the tank. The tank now requires just an acid wash inside, resurfacing with a sealant and painting.
We continue cleaning the inside of the fuselage with it now showing signs of progress, but also exposing more areas of damage. A method of cleaning the original brass screws has now worked very well and a large number are ready for reinstallation. Soaking them in a vinegar and salt solution, then tumbling them in green corn has them looking like new.
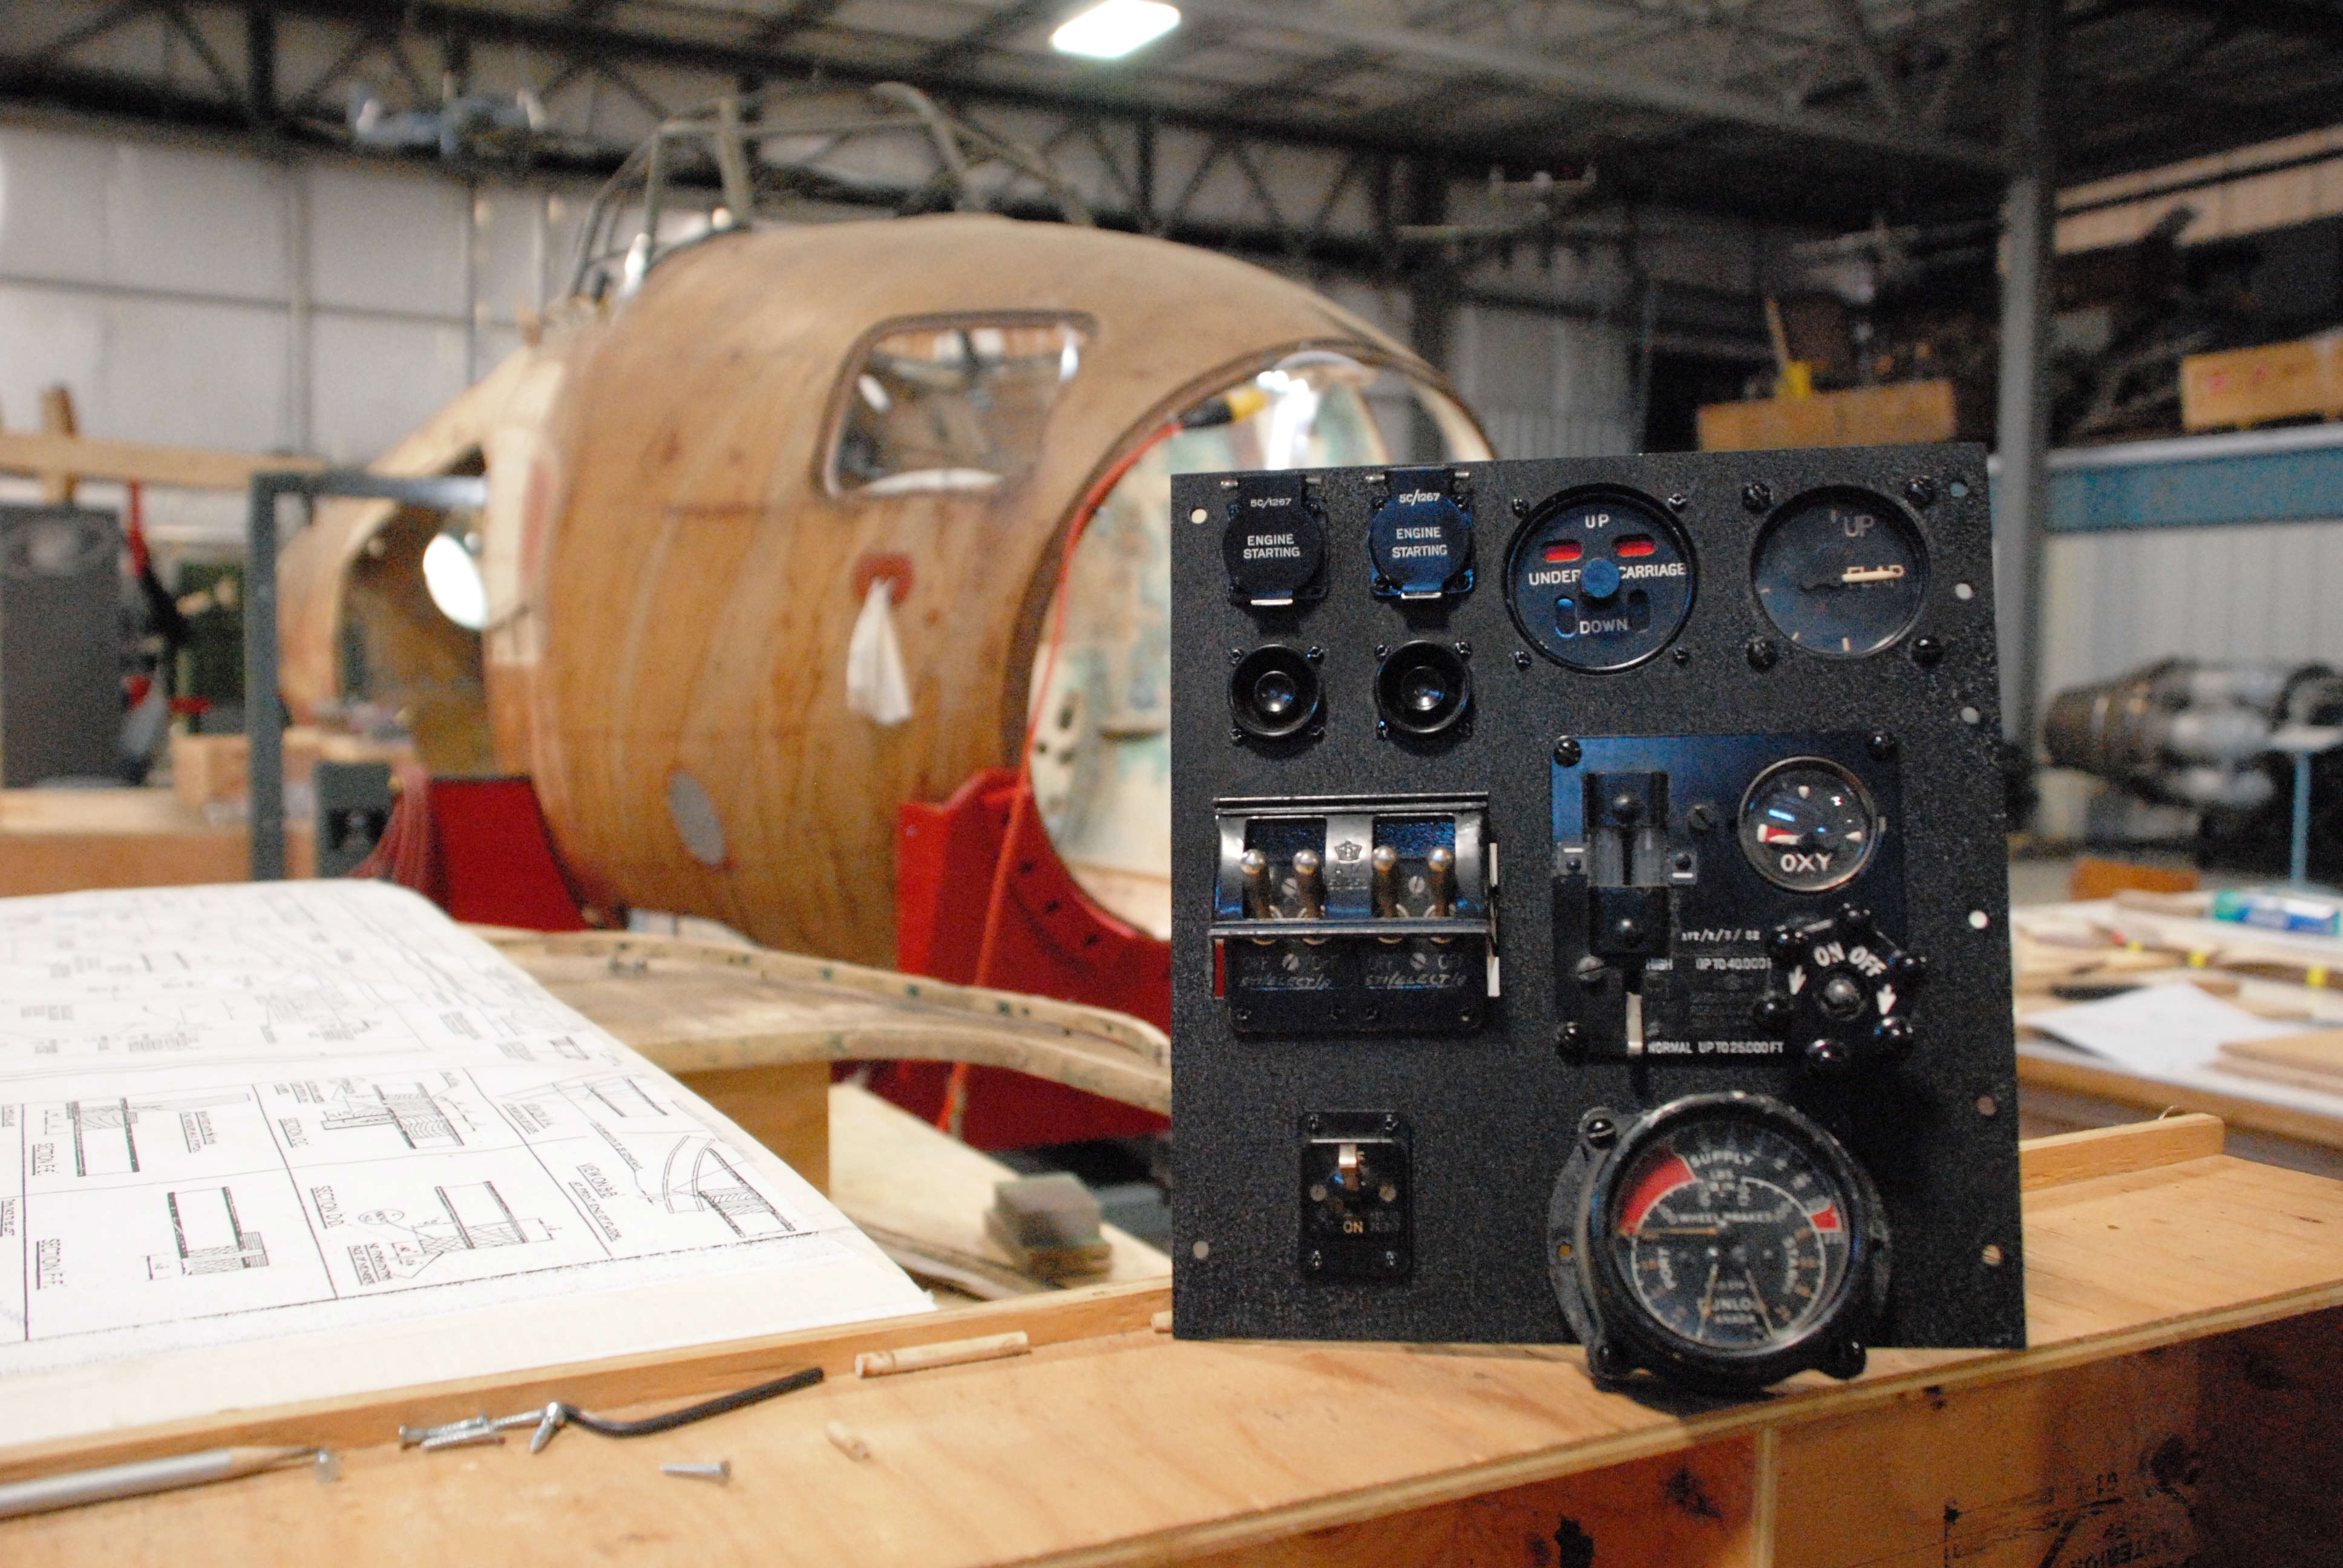
Member Rick F. continues to work on restoring the cockpit instrument panels for both the Mosquito and Hurricane. Period instruments and controls are great souvenir and collectable pieces and almost all have had to be sourced as the originals are no longer with the airplanes.

The latest 'new' instrument panel for the Mosquito which includes engine start buttons, triple pneumatic gauge and undercarriage indicator.
Events and Miscellaneous
The only event in this quarter was our participation in the Remembrance Day ceremonies at the Bomber Command Museum. The unusually warm weather encouraged many hundreds of people to attend. CMS board member Brian Collins laid a wreath at the cenotaph after which we spent a busy few hours talking to visitors who took the opportunity to tour the museum and to chat with our volunteers.
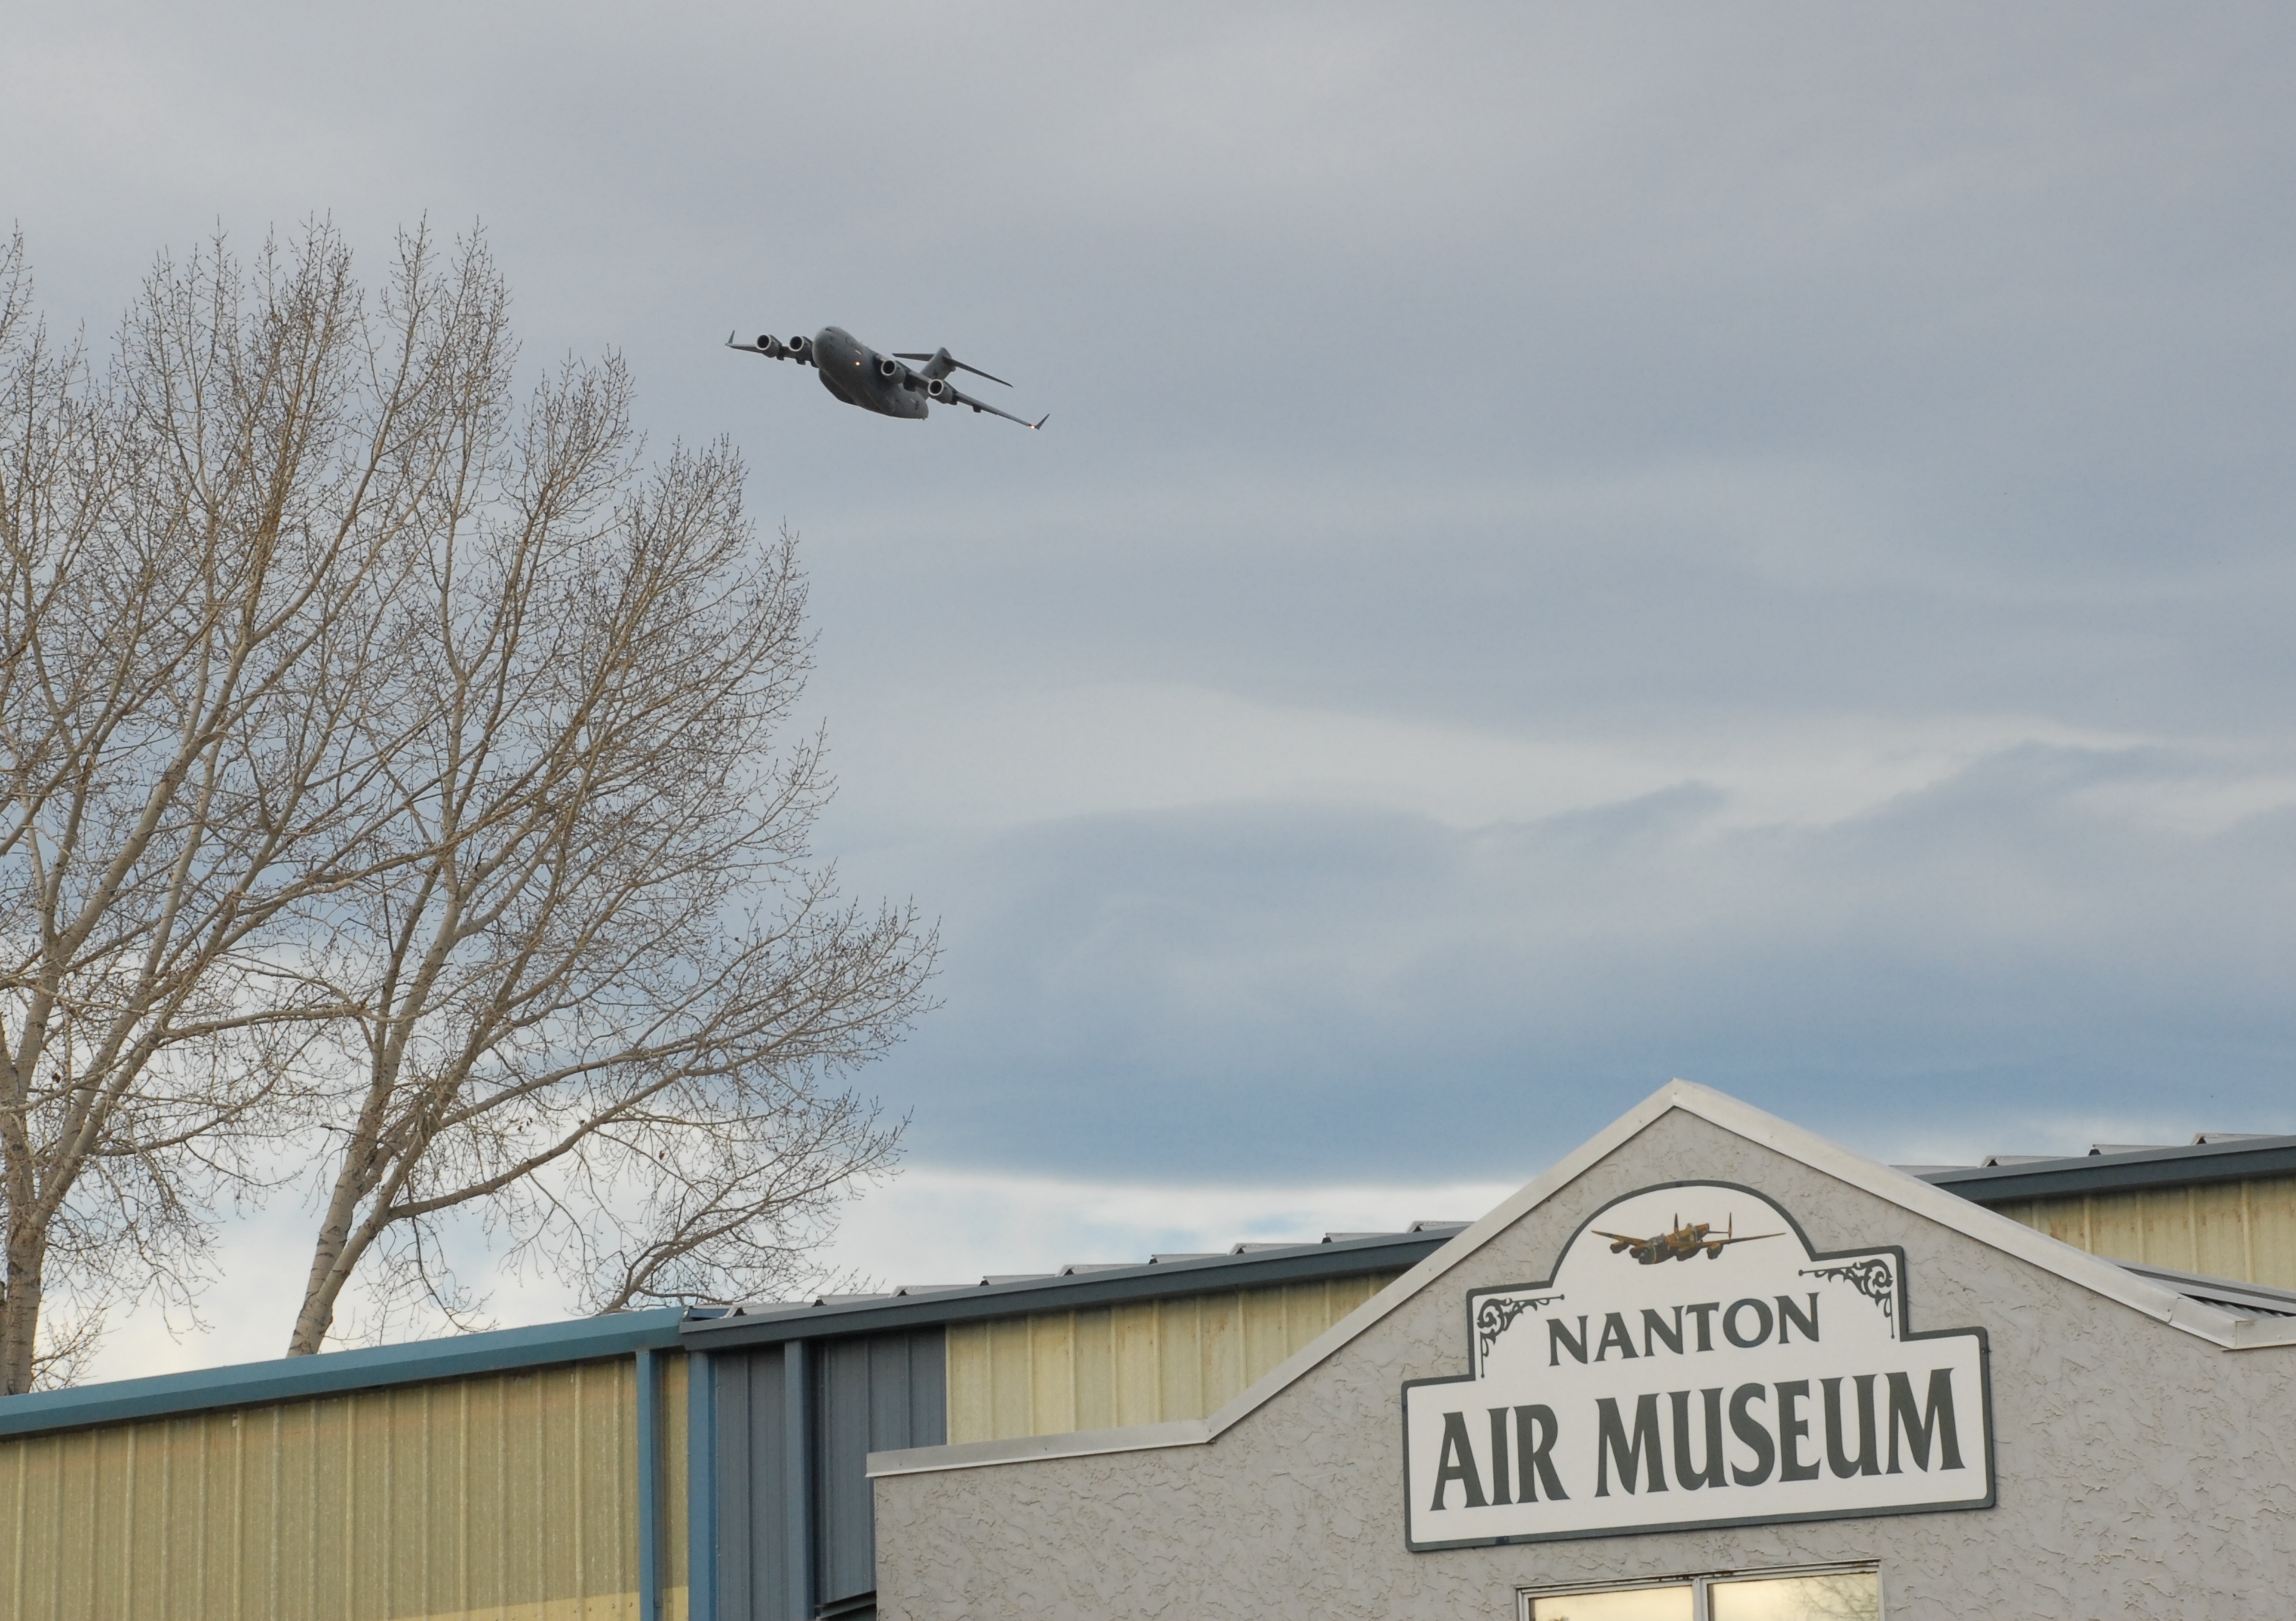
An RCAF C-17 heavy transport made several passes during the Remembrance Day ceremonies.
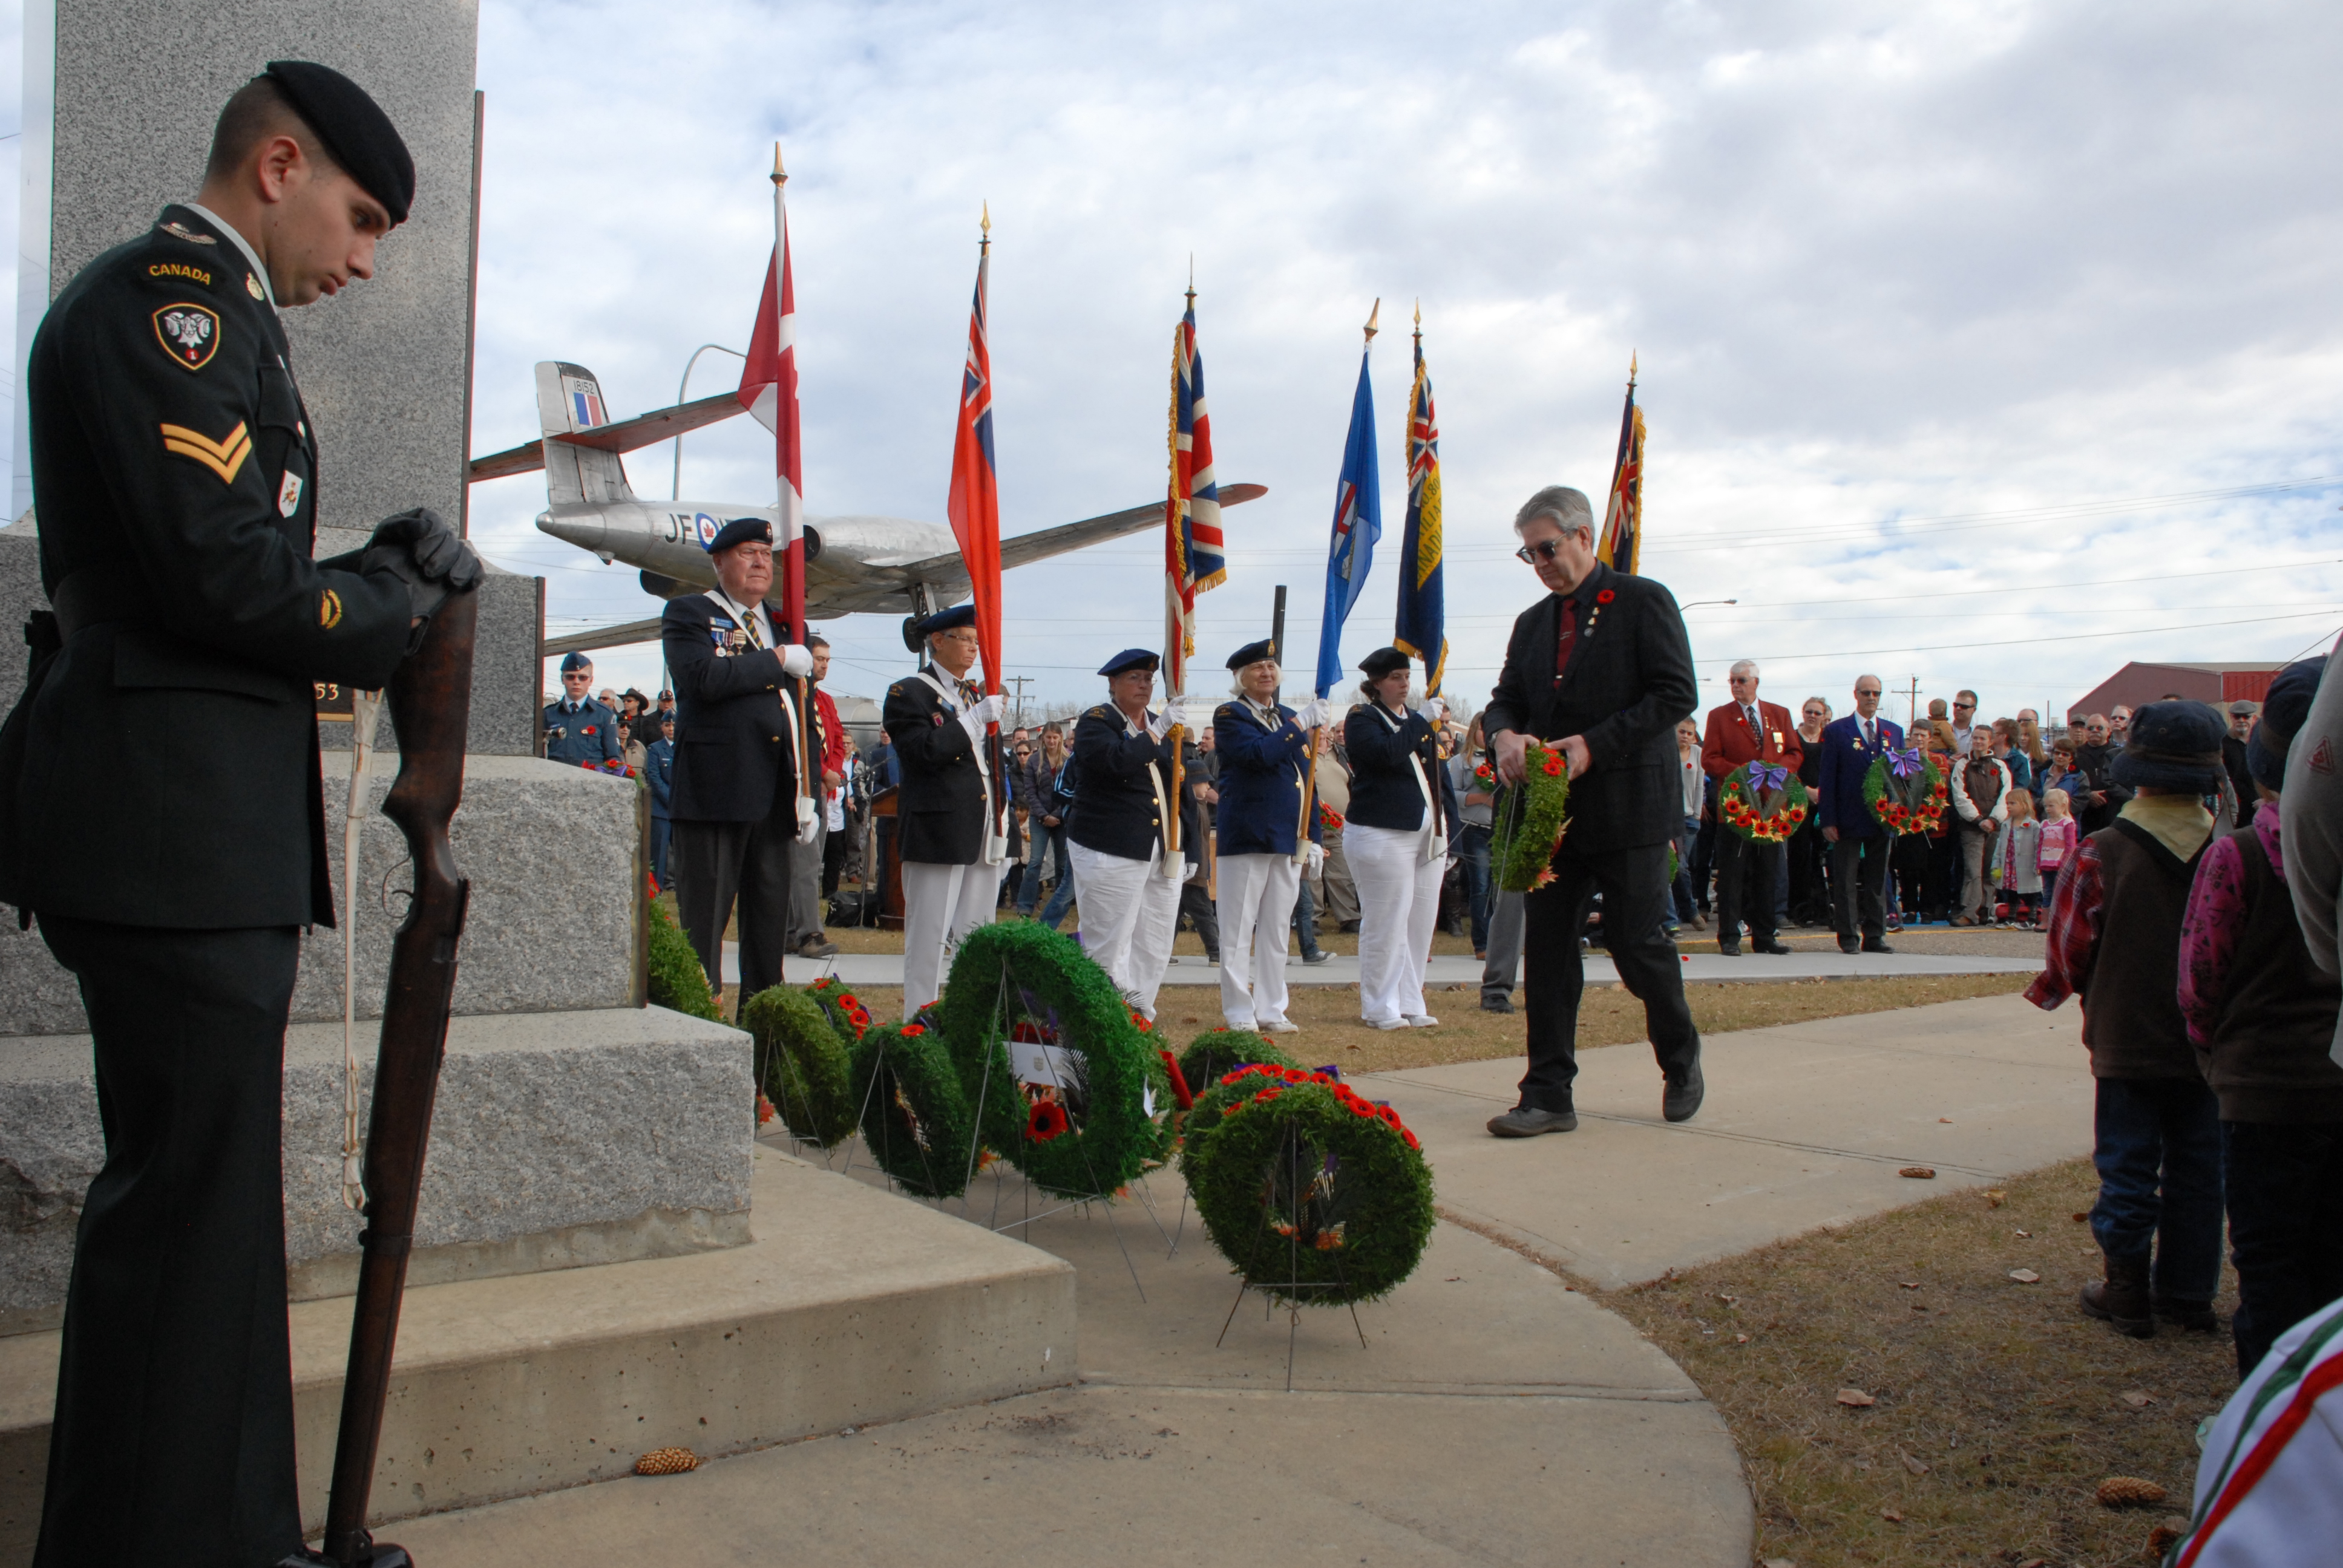
CMS board member Brian Collins lays a wreath at the cenotaph at the Bomber Command Museum.

Featured in the January 2017 issue of AEROPLANE MONTHLY magazine out of the UK, is a half page story on the restoration progress of the Hurricane.
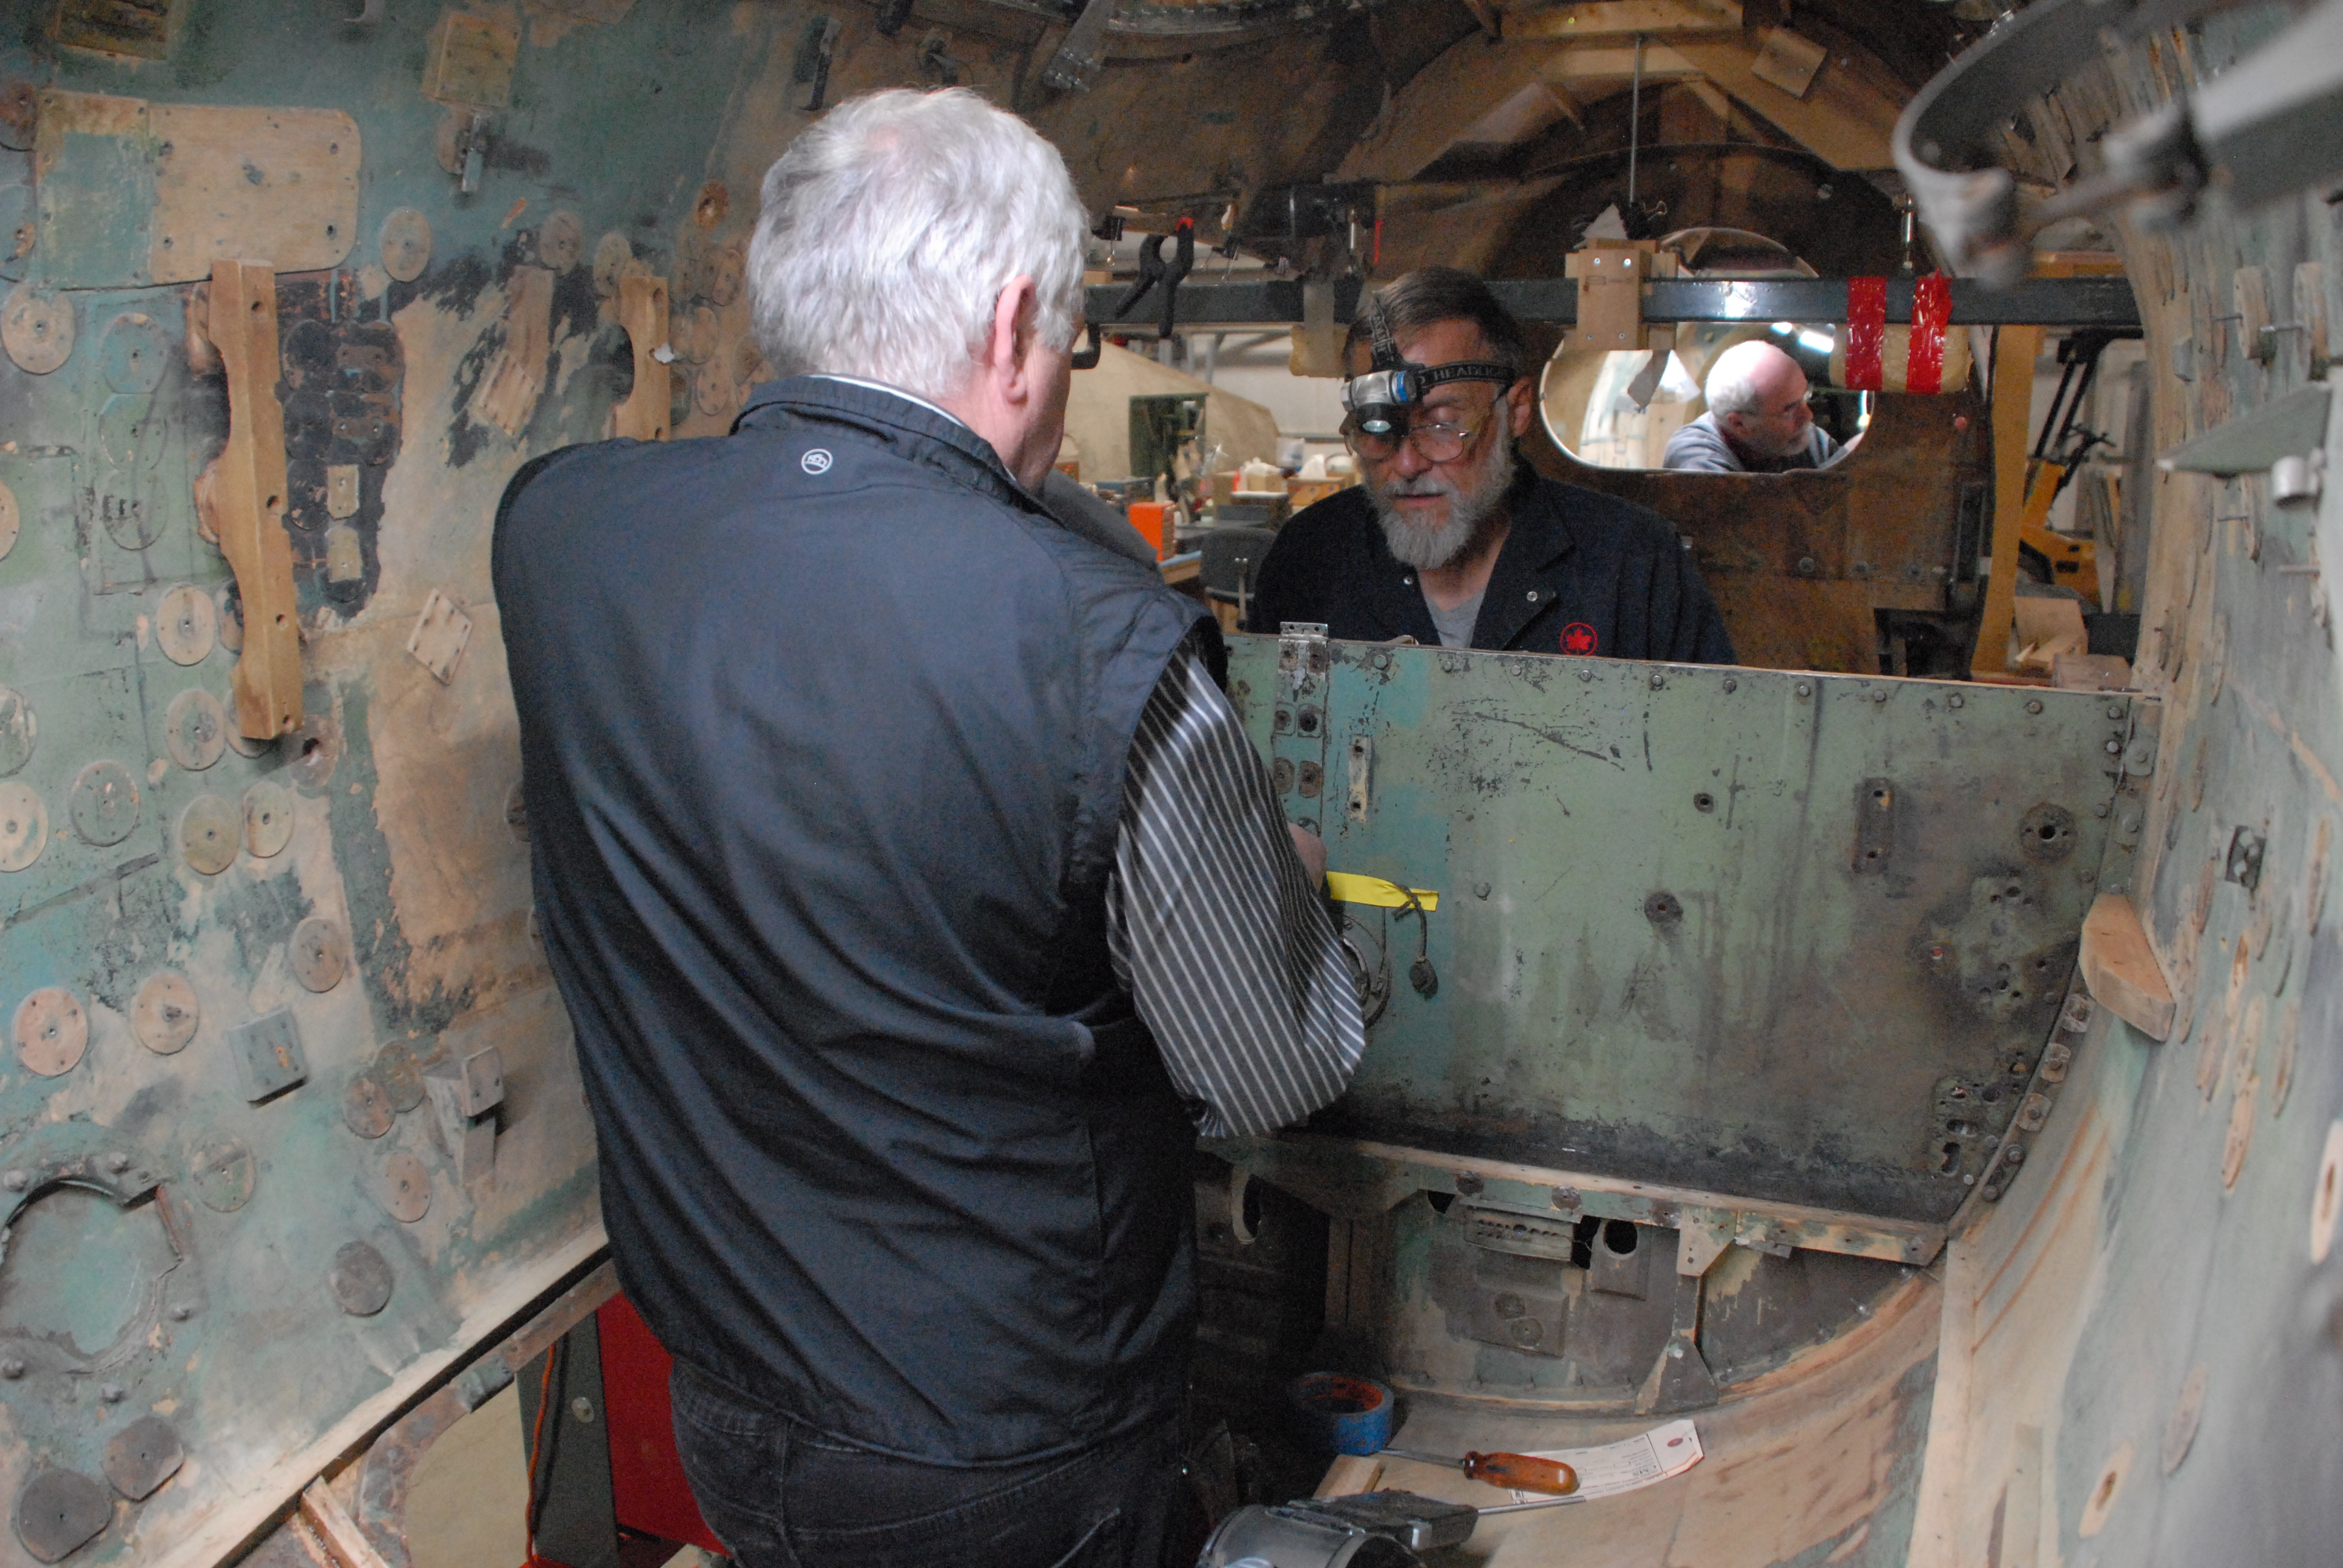
The chief engineer on the restoration of sister ship, Mosquito CF-HMJ in Vancouver, stops in to visit when business or family brings him to the Calgary area. Mel Johnstone is often inundated with questions from our volunteers about details and mysteries in restoring the airplane. On a visit earlier this year Mel mentioned that the Mosquito, owned by Bob Jens was grounded because of an unserviceable fuel pump and that so far not even Vintage V-12s, which had overhauled the rare model Merlin engines, could locate a proper model pump. At some point it occurred to us that in the parts collection we had purchased from Tony Bianchi of Personal Plane Service that there might be a fuel pump. Against very long odds, we had one complete and two partial units of the model required to get the Vancouver Mosquito back into the air. In late November Mel left with all three units which he then sent off to Vintage V-12s to overhaul. It was an easy decision as owner Bob Jens had donated all of his spares and surplus materials to us once his Mosquito was complete.
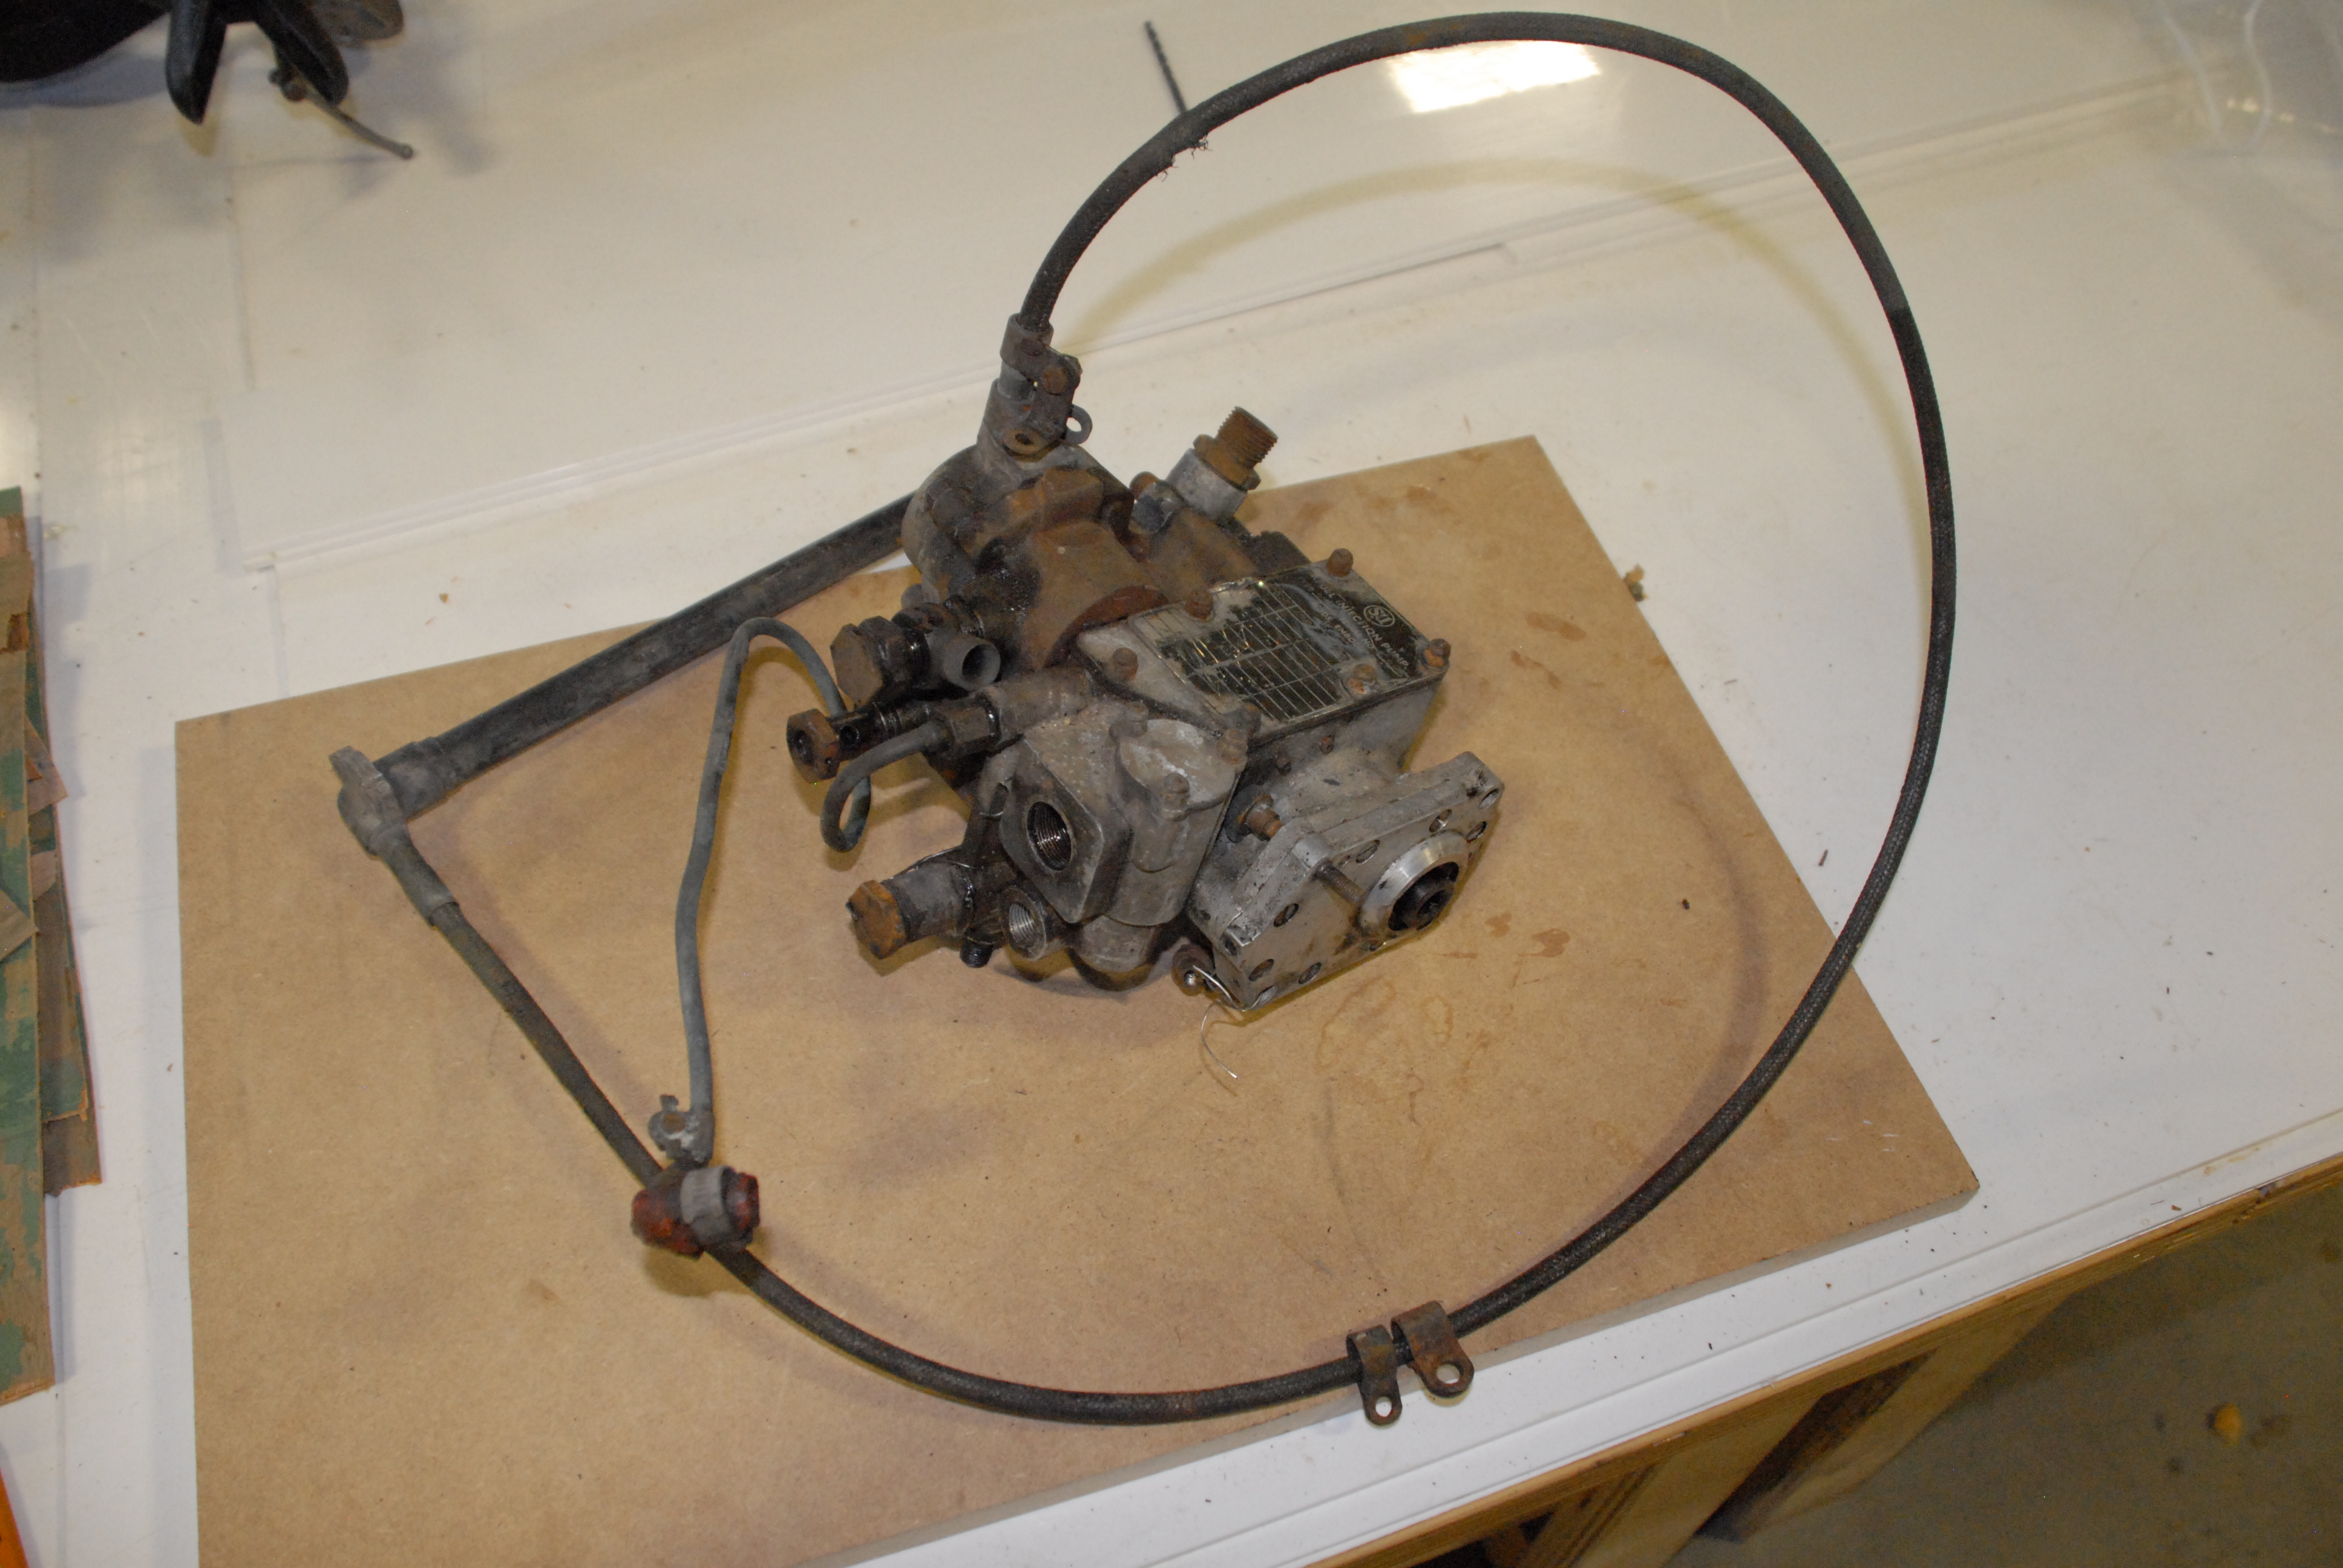
The SU fuel injection pump acquired from Personal Plane Service and now on loan to chief engineer Mel Johnstone so that he can get ex-Spartan Mosquito CF-HMJ back in the air.
<

Richard de Boer, President
January 15, 2017
![]()